If you’re a student or an attendee in seminars and lectures there are times you might feel tired, bored, and less interested in listening especially if presentations are boring.
On the other hand, for learners, recorded or recording lectures are very useful especially in their absence and when they have something they can’t understand. They can look at it once again later.
So how to record online lectures? What is the best software to record online lectures?
To make these things possible, a powerful recording application software would be of great help. Thus, VideoPower GREEN or ZEUS, an easy to use, hassle-free, trusted, and professional features recording application software would be best for this kind of job.
Just click the link below to download and install this app and don’t forget to check out this article to learn more.
ZEUS can do what VideoPower series can do and more with an almost similar interface.
Check out NOW! Start easier with more affordable prices!
How to Record Online Lectures on Laptop
Step 1: Set Sound Source and Record Area to Record Lectures
1.1 Choose a sound source
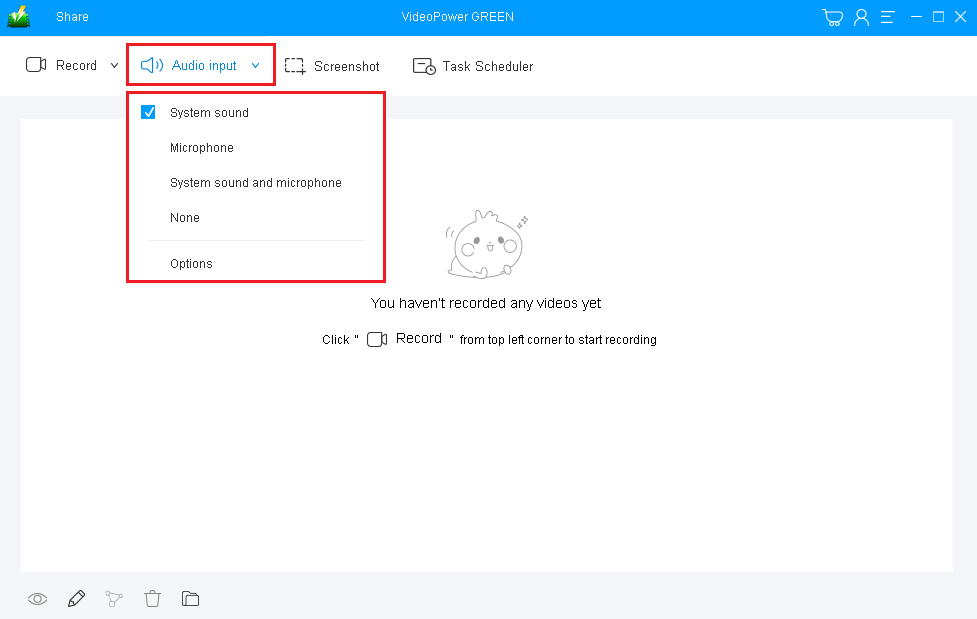
The first thing you need to set in this video recording software is the sound source. You can choose “System sound”, “Microphone”, “System sound and microphone” or “None”. To record online lecture videos, you can select “System sound”.
1.2 Select a Recording Area

After setting the sound source, set the recording modes to capture the exact range of the screen where you desired to record.
Choose among “Region”, “Fullscreen”, “Around Mouse”, “Web Camera”, modes and you can also choose “Audio Only” if you want to record only the audio of the file.
“Fullscreen” or “Region” is suitable for recording online videos.
Step 2: Start to Record Lectures on Laptop
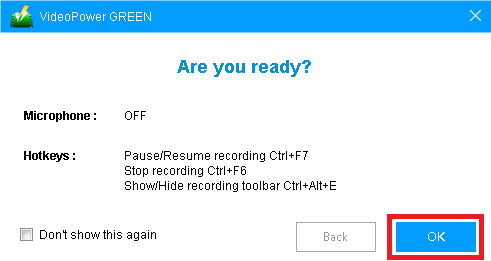
Get ready to play the lecture video you are going to record. Click “OK” on the pop-up window to start recording.
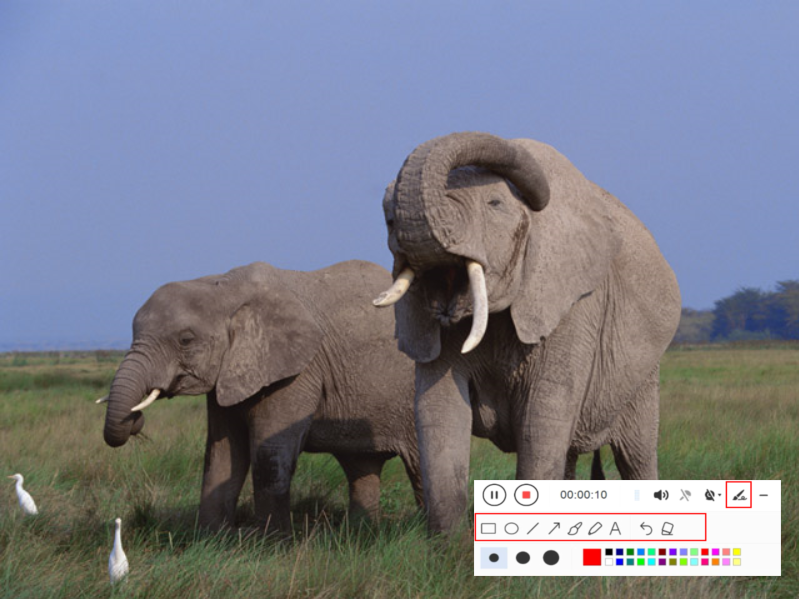
While recording you can add lines, arrows, shapes, texts, highlight, blur, etc. by clicking the edit button if you want to mark some important details.
Step 3: Save and Check the Recording

Click the “Stop” button to end the video recording of the lecture.
After that, the recorded video file is saved in the pointed output folder on your PC.
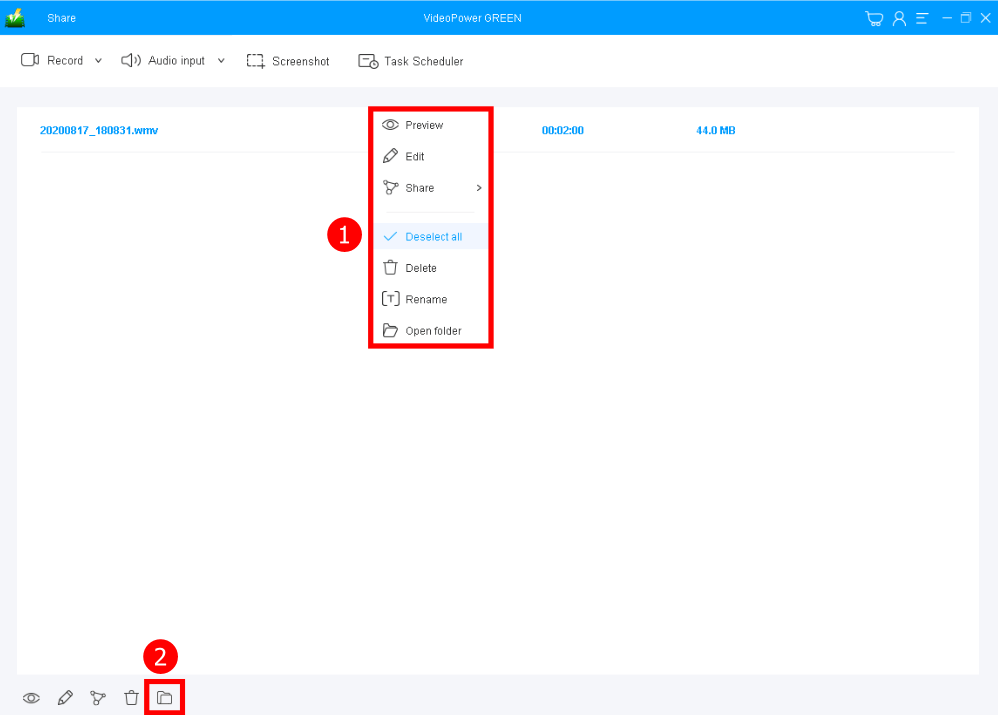
1. Your recorded lecture video can be seen in the main interface. You can right-click the file and do more operations if you like.
2. Click the folder icon to view it in the pointed output folder.
Conclusion:
Missing out important parts in the lecture is a bit of a problem. Looking at it once more can be of great help most especially for the learners. Making it possible with the help of a screen recording software.
Thus, VideoPower GREEN, a hassle-free, trusted, and professional features recording application software is best suited for this kind of job.
Moreover, this app can help users beautify their presentations and emphasize important content on it with its editing feature. It can also help users save some time and effort by just activating its task scheduler feature.
ZEUS series can do everything that VideoPower series can do and more, the interface is almost the same.
Check out NOW! Start easier with more affordable prices!
ZEUS Series
VideoPower brother products, start easier with more affordable prices!
| ZEUS BUNDLE 1 Year License ⇒ $29.99 |
ZEUS BUNDLE LITE 1 Year License ⇒ $19.99 |
ZEUS RECORD LITE 1 Year License ⇒ $9.98 |
ZEUS DOWNLOAD LITE 1 Year License ⇒ $9.98 |
||
| Screen Recorder | Screen&Audio Recording | ✔ | ✔ | ✔ | |
| Duration Setting, Schedule Recording | ✔ | ||||
| Video Downloader | Paste URL to download, batch download | ✔ | ✔ | ✔ | |
| Search/download video,browser detector | ✔ | ||||
| Music Recorder | Record music and get music ID3 tag info | ✔ | ✔ | ||
| Music search/download/record, CD Ripper/Creator, Audio Editor | ✔ | ||||
| Video Editor | Edit and convert videos, create slideshow | ✔ | |||
| Screen Capture | Capture screen, image editor | ✔ | |||