When you watch videos on the Internet, you will often see a variety of different watermarks somewhere in the video screen, with text or pictures. Watermark is a logo or text for a product. It is used to make it difficult for the original image or product to be copied by others.
Many people have tried to watermark a video. In particular, those who share video tutorials on the Internet will more or less add their own trademarks on the video or promote their own watermark information for them.
If your video has a watermark then you can easily avoid people from stealing your masterpiece and the question is, what is the best way to watermark your video?
VideoPower BLUE or ZEUS is a powerful, multi-faceted software that contains a lot of features such as screen recording, video editing, and conversion. Of course, it lets you add watermarks to your video in the simplest way.
You can try to use the software for free by downloading its trial version below.
ZEUS can do what VideoPower series can do and more with an almost similar interface.
Check out NOW! Start easier with more affordable prices!
Watermark your Video – Simple & Easy
Step 1: Add the file to the program
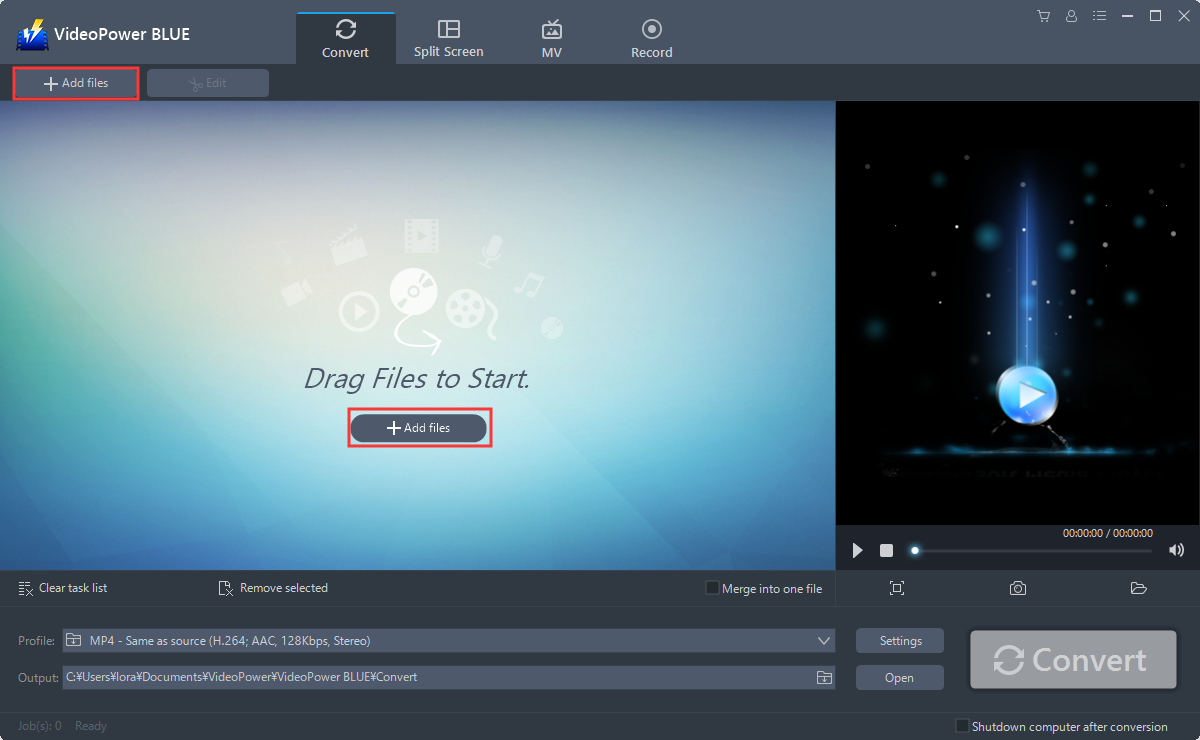
After you launch the program, You can directly import the video file to the program by clicking the “+ Add files” button or by drag-and-drop the file to the interface.
Step 2: Add watermark to the video file
With the video editing function, you can either add the logo image or text as a watermark on the video.

The video will be displayed on its interface. To start editing, click the “Edit” button to open the edit box.
To easily add a watermark on the video.
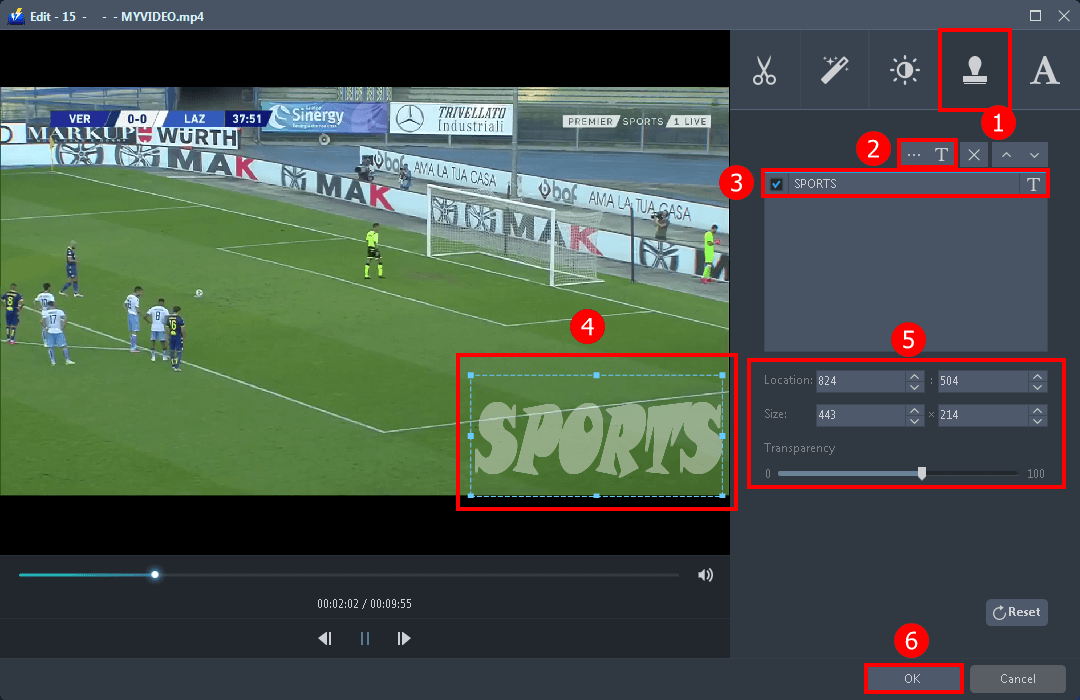
1. Click the Watermark icon.
2. Click the “T” icon to add text as a watermark or click the dot icon to watermark the video using an image.
3. Input the texts you want to make it a watermark.
4. Drag the watermark to adjust the size of it.
5. Change the location of the watermark and adjust the transparency as preferred.
6. Click “OK” to save the changes.
Tips: VideoPower BLUE built-in editor lets you flip, crop, and rotate the video, you can also enhance the brightness and saturation, adjust the volume, speed, and add subtitles on it.
Step 3: Save the video with watermark
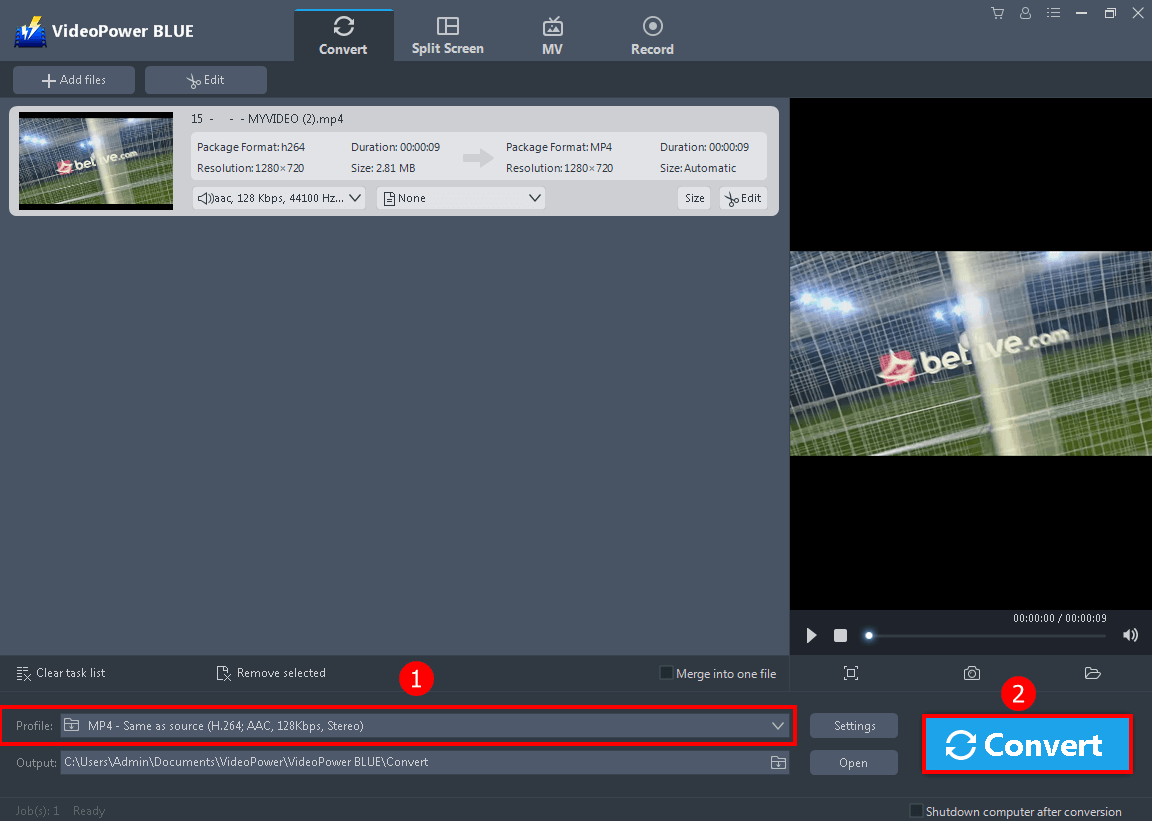
1. You can change the output format by clicking the “Profile” drop-down button. If not, the file format of the video will remain when the format of the input file is not included in the list MP3 is the default format.
2. Click the “Convert” button to save your video with a watermark on it.

The program will pop up a window to inform you once the conversion is completed. Click “OK” to open the folder of your saved converted file.
Conclusion:
With the steps provided above, putting a watermark in your videos is within your fingertips.
VideoPower BLUE is definitely the perfect software for you. It’s handy and flexible with a built-in video editor that you can use for video and audio enhancement and merge multiple video clips into one file.
Moreover, the software not only allows you to watermark your video but you can also use it for converting, screen recording, movie making, and split-screen.
ZEUS series can do everything that VideoPower series can do and more, the interface is almost the same.
Check out NOW! Start easier with more affordable prices!
ZEUS Series
VideoPower brother products, start easier with more affordable prices!
| ZEUS BUNDLE 1 Year License ⇒ $29.99 |
ZEUS BUNDLE LITE 1 Year License ⇒ $19.99 |
ZEUS RECORD LITE 1 Year License ⇒ $9.98 |
ZEUS DOWNLOAD LITE 1 Year License ⇒ $9.98 |
||
| Screen Recorder | Screen&Audio Recording | ✔ | ✔ | ✔ | |
| Duration Setting, Schedule Recording | ✔ | ||||
| Video Downloader | Paste URL to download, batch download | ✔ | ✔ | ✔ | |
| Search/download video,browser detector | ✔ | ||||
| Music Recorder | Record music and get music ID3 tag info | ✔ | ✔ | ||
| Music search/download/record, CD Ripper/Creator, Audio Editor | ✔ | ||||
| Video Editor | Edit and convert videos, create slideshow | ✔ | |||
| Screen Capture | Capture screen, image editor | ✔ | |||