Video editing has come a long way since the earlier years. Before only film-makers are able to make recordings and videos for entertainment, but as time pass by since camera was more utilized for personal used and sold commercially, people are able to make their own memories not limited photos but also videos too. On this day we are able to shoot whatever we want without any hassle because are cameras are now integrated with phones that are handheld.
Editing has been very essential because it enhances the quality of the clip just like adding music on to the background, adjusting the color to complement the theme selected, or to trim or add necessary clips and connect them to produce a project.
There are several video editing software for pc that could be very simple that the products of the project are also according to the complexity of the software. There also some software that produces stunning output but the process of creating one through it is very complicated because the interface itself is complex and likely to be used by professionals.
For people in the middle of it, it is very hard to settle on software that doesn’t the glove perfectly, too simple or too difficult.
VideoPower BLUE or ZEUS is a video converter and editing software that can produce stunning results but doesn’t compromise your ability to decode buttons and necessary functions. This is the best video editing software for beginners and can be in line with the best professional video editing software.
ZEUS can do what VideoPower series can do and more with an almost similar interface.
Check out NOW! Start easier with more affordable prices!
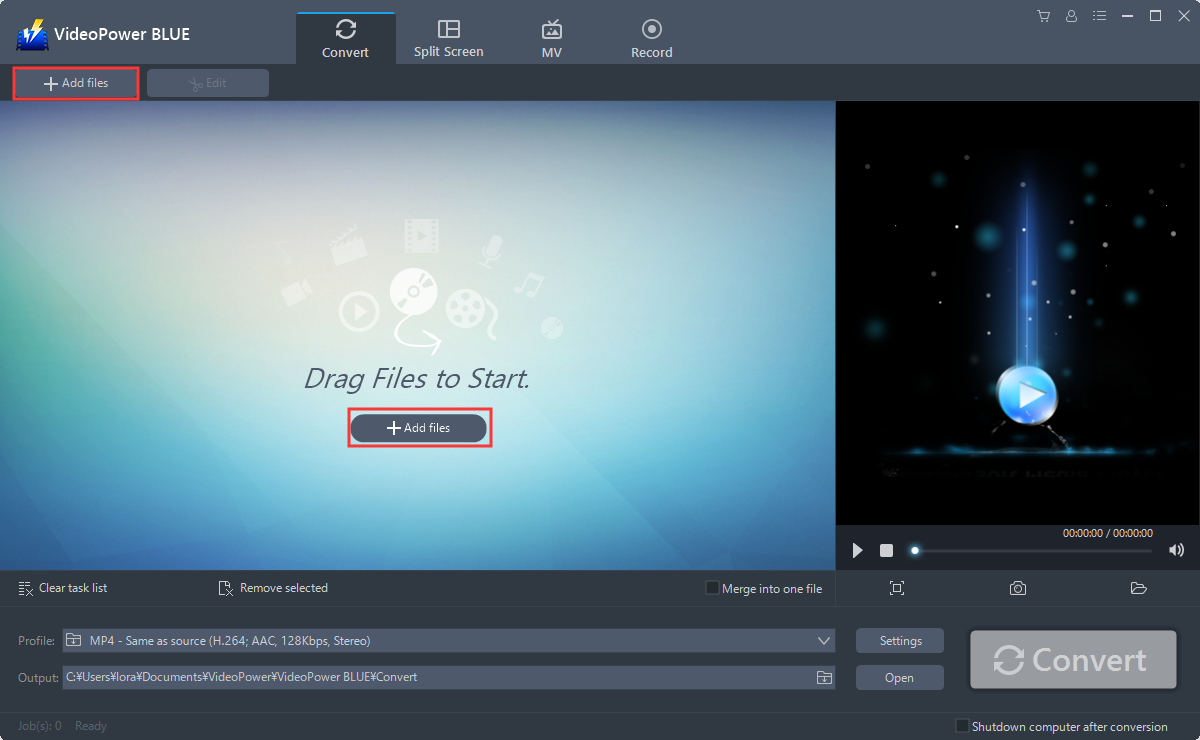
Step 1: Import video files to the program
Launch VideoPower BLUE and go to the “Add files” button to import any video or audio file that you want to convert.
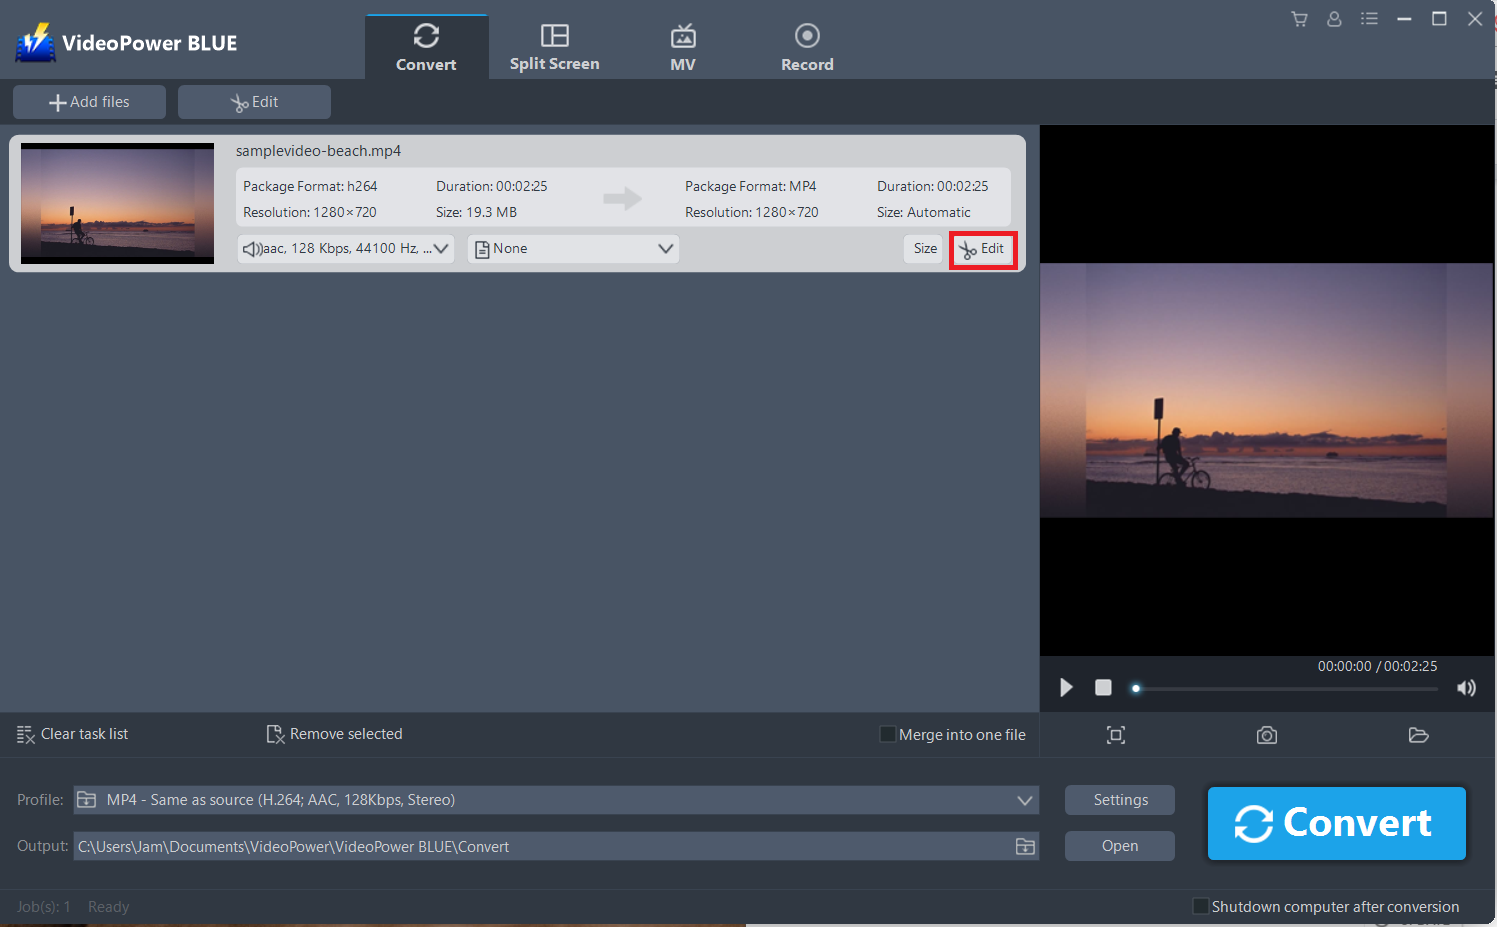
Step 2: Edit video
The imported file is displayed in the list.
Click the “Edit” button at the right side of the added video to enter the built-in video editor.
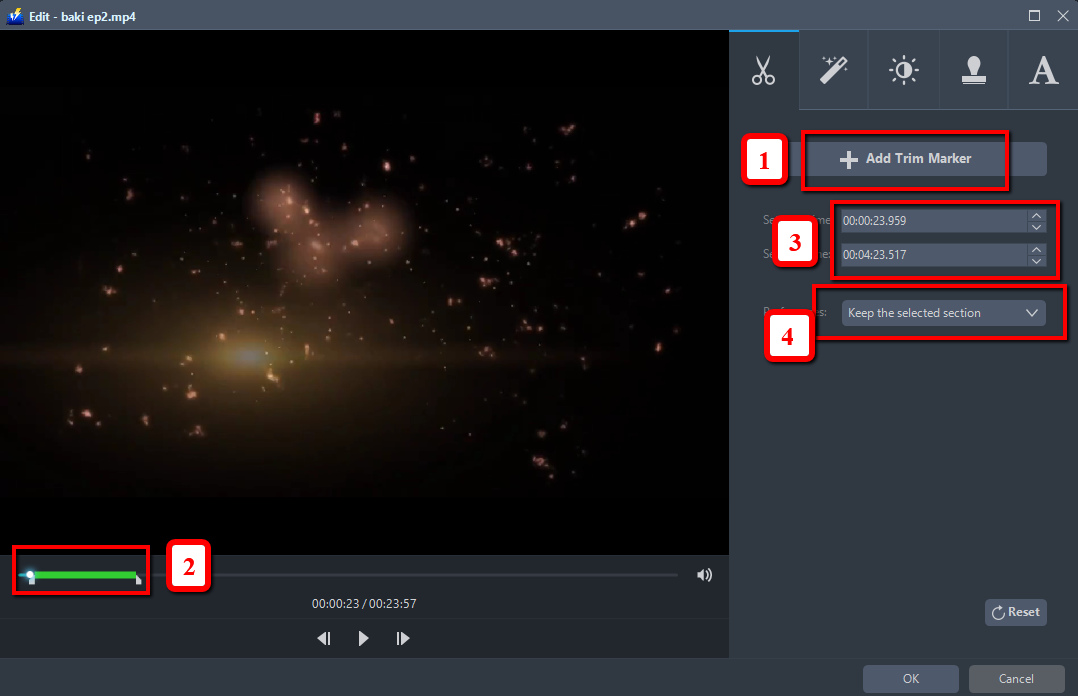
2.1 Trim Video
You can do the following steps to trim your video:
1) Click “Add Trim Marker” to add a trim marker to the progress bar, you can also add multiple trim markers by clicking this button multiple times.
2) Drag the slider to select the part you want to hold.
3) You can click the up or down button to set the start and end time as well.
4) Now you can choose to keep or delete the selected section.
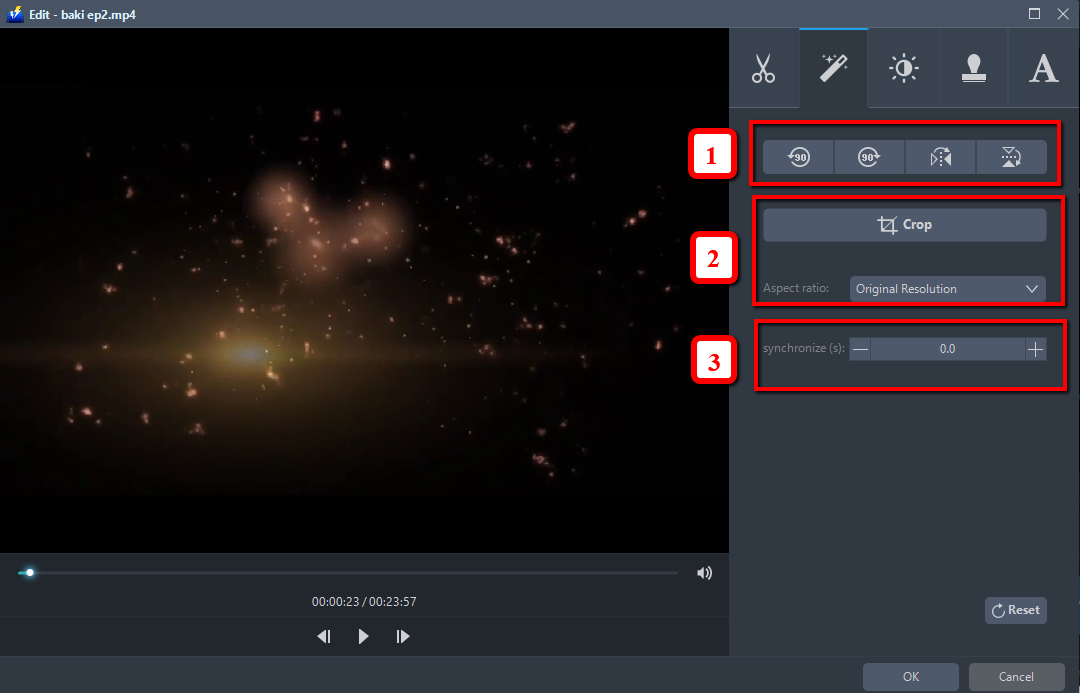
2.2 Adjustments
1) You can do the following steps to adjust your video:
2) Rotate your video position.
3) Crop video screen size.
4) Synchronize the video and audio.
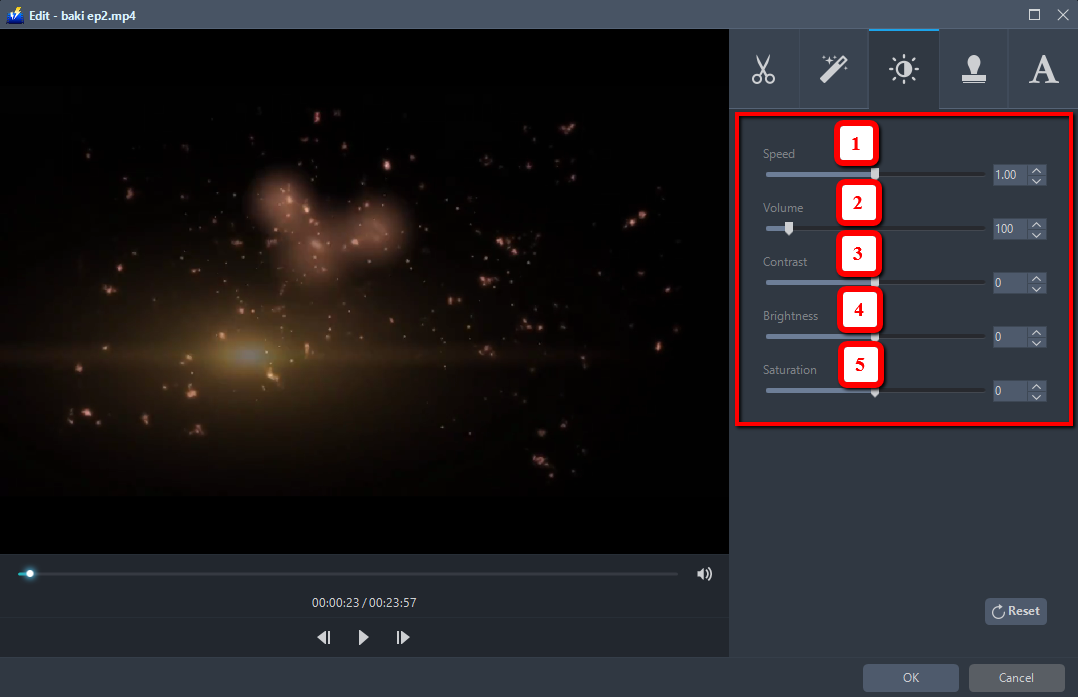
2.3 Effects
You can do the following steps to change some EFFECTS on your video:
1) Speed – Speed up, slow down, the tempo of your video.
2) Volume – Set sound level.
3) Contrast – Change or adjust the difference in lightness, brightness and/or hue.
4) Brightness – Where you can adjust how lightness or darkness you want your video.
5) Saturation – Adjust the intensity of color in an image.
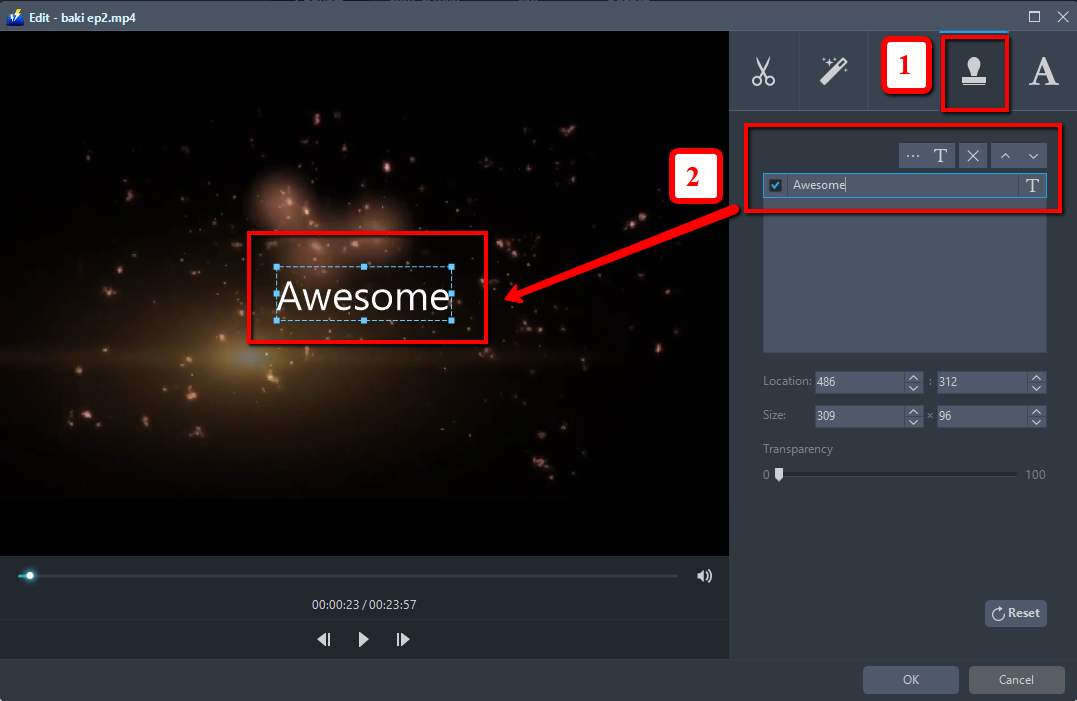
2.4 Watermark
Add a watermark on the video.
1. Click the Watermark icon.
2. Add text, logo or image as a watermark.
2.5 Subtitle
Add subtitles for the video. You can import external subtitles, or search subtitles for the corresponding subtitles from the Internet. Please refer to another tip about how to edit the subtitle file.
1) Click the Subtitle icon.
2) Click Search Box (you can either click a subtitle saved on your computer or find it online).

Step 3: Conversion
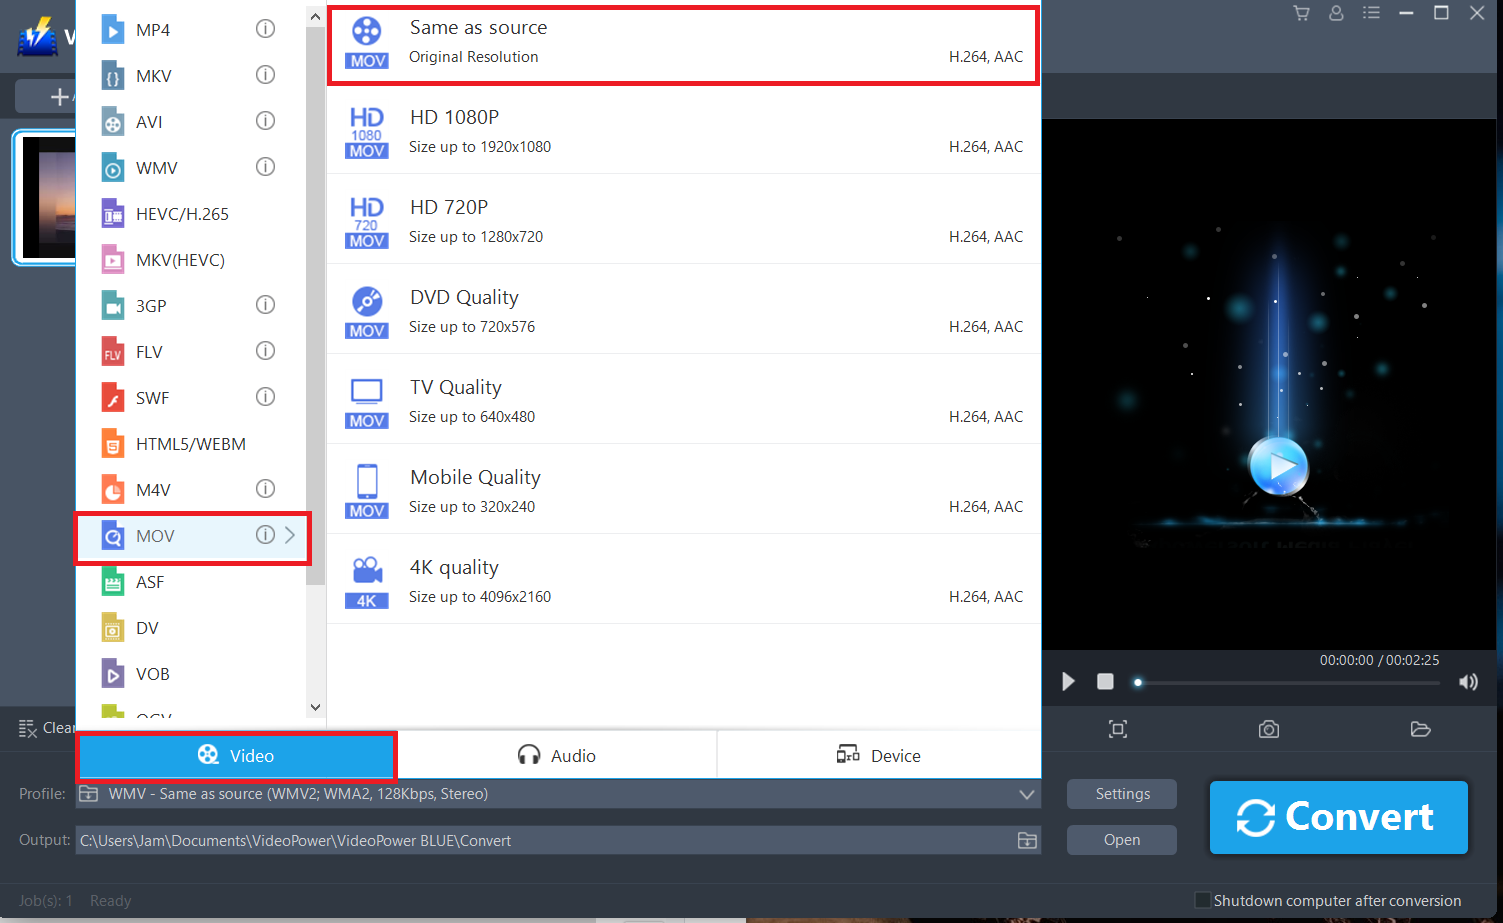
3.1 Set output format and quality
Optional: Users may change or may not change the format and quality of the file before clicking “Convert”.
1) Click to open the “Profile” drop-down menu, then choose the format you want from the profile list.
2) Here you can click “Video” and then choose your desired format, here we choose MOV as an example.
3) You may now choose the quality you prefer.
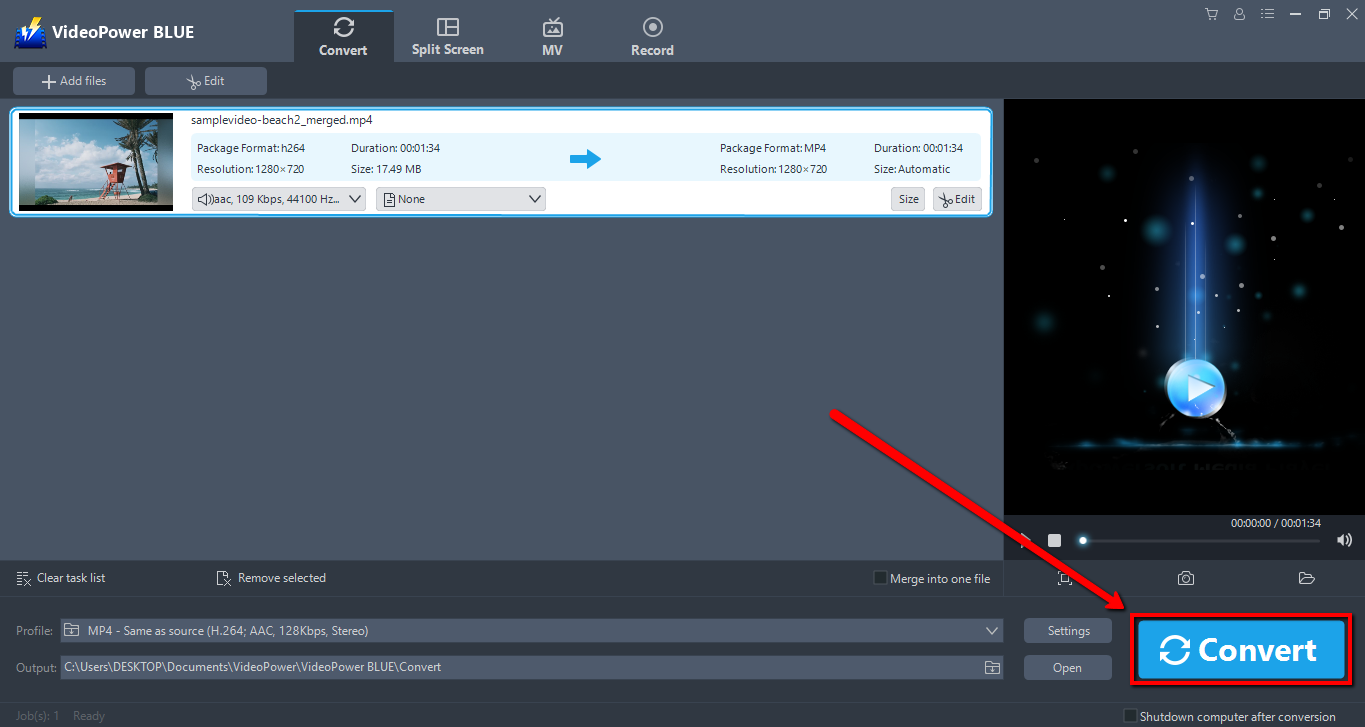
3.2 Start the conversion
When the edits and changes are done, click the “Convert” button. The software will start the conversion process and save the edited video in MP4 format by default if no changes has been made on the profile.
3.3 Open the storage folder
A pop-up window from the program will appear informing you that the conversion is complete.
Click “OK” to open the folder of your saved converted files.

Conclusion:
VideoPower BLUE is packed with the most current editing amenities that could produce an amazing result without the hassle of complicated buttons and keys. More to conversion and editing, It can record screens for more important tasks like video tutorials and other stuff. It can also combine two different videos in one viewing or more. It is definitely the ultimate video editing software for pc ever! Try it now!
ZEUS series can do everything that VideoPower series can do and more, the interface is almost the same.
Check out NOW! Start easier with more affordable prices!
ZEUS Series
VideoPower brother products, start easier with more affordable prices!
| ZEUS BUNDLE 1 Year License ⇒ $29.99 |
ZEUS BUNDLE LITE 1 Year License ⇒ $19.99 |
ZEUS RECORD LITE 1 Year License ⇒ $9.98 |
ZEUS DOWNLOAD LITE 1 Year License ⇒ $9.98 |
||
| Screen Recorder | Screen&Audio Recording | ✔ | ✔ | ✔ | |
| Duration Setting, Schedule Recording | ✔ | ||||
| Video Downloader | Paste URL to download, batch download | ✔ | ✔ | ✔ | |
| Search/download video,browser detector | ✔ | ||||
| Music Recorder | Record music and get music ID3 tag info | ✔ | ✔ | ||
| Music search/download/record, CD Ripper/Creator, Audio Editor | ✔ | ||||
| Video Editor | Edit and convert videos, create slideshow | ✔ | |||
| Screen Capture | Capture screen, image editor | ✔ | |||