Index
GREEN
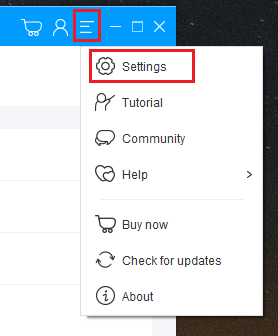
3. Settings
Before recording, follow the appropriate settings according to your needs.
Open the settings screen.
3.1 Output folder
Set the destination for the recorded video and audio files.
If you cannot save the recorded video due to security software, or if there is not enough free space on C drive, we recommend that you set the output folder to a drive other than C drive.

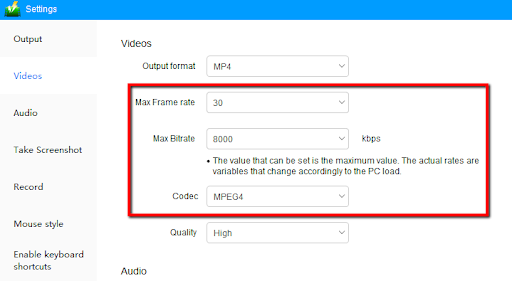
3.2 Video: Settings for recording
Recorded videos will be saved as MP4 by default.
If you want to save the recording in other formats, you can change it to WMV, AVI, MOV, MPEG, TS, GIF, etc.
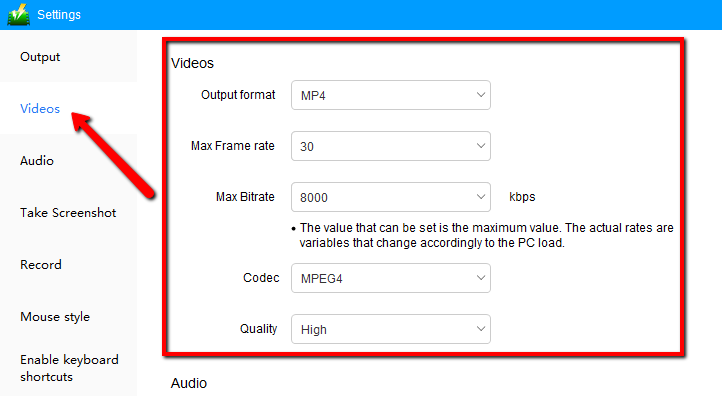
The following settings are recommended to record the video playing in the browser or PC player and save it as a 720P or 1080P video.
According to our test results, MPEG4 has better image quality than H.264. If the recorded video is not smooth and the image quality is poor, change the codec to MPEG4.
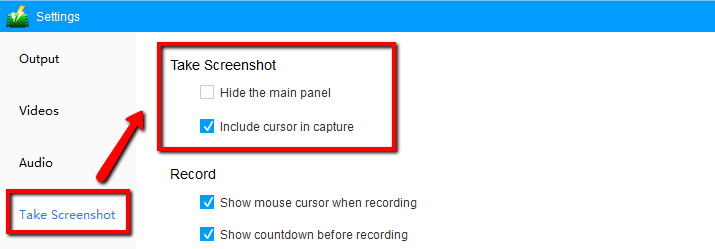
3.3 Take Screenshot
Hide Main Panel:
Set to hide the VideoPower GREEN product screen when taking screenshots.
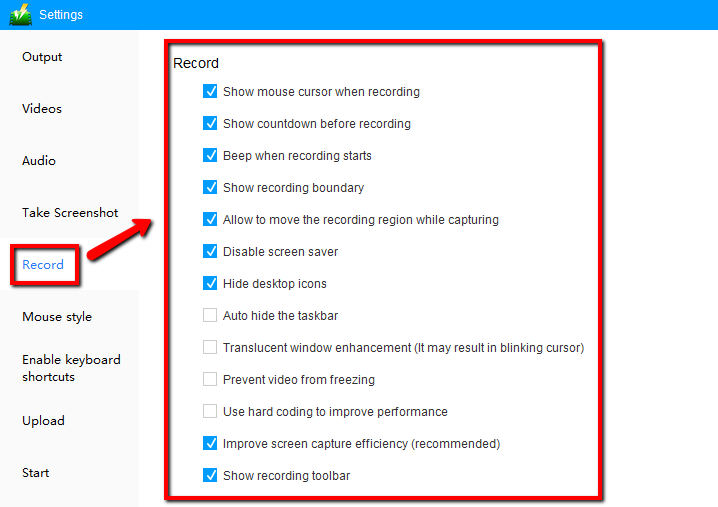
3.4 Recorde
Hide taskbar automatically:
We recommend that you check this option if you want to record the video in full screen.
During recording, you can press the keyboard shortcut to display the taskbar.
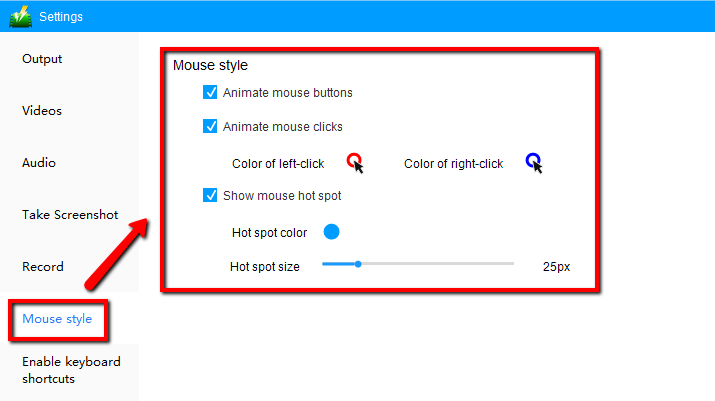
3.5 Mouse Style
When you want to create a tutorial, you need to record the movement of the mouse cursor.
VideoPower GREEN allows you to record the screen with the movement of the mouse cursor.
To record the mouse cursor on the recorded screen, select the “Show mouse animation effect” checkbox.
You can then select the animation color, mouse hotspot color, and size.
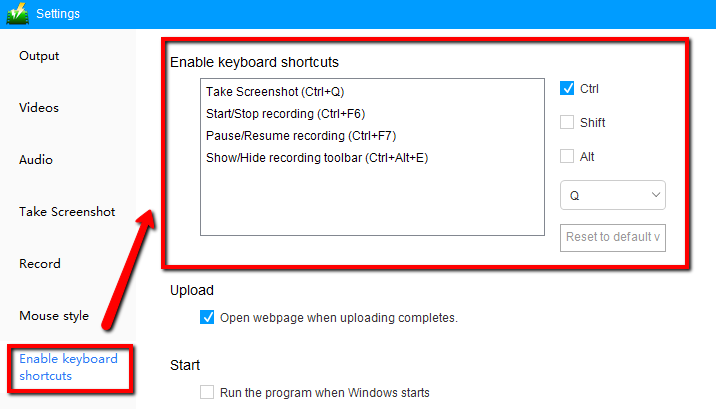
3.6 Keyboard shortcuts
Set and remember keyboard shortcuts, even if the recording toolbar is hidden, you can press the keyboard to start/stop recording, pause/resume, show/hide recording toolbar.
3.7 Language settings:
The following setting options are also available.
