Index
GREEN
4. Record Screen
Before recording, follow the appropriate settings according to your needs.
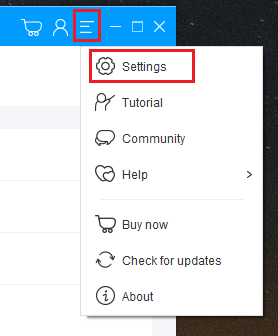
Open the settings screen.
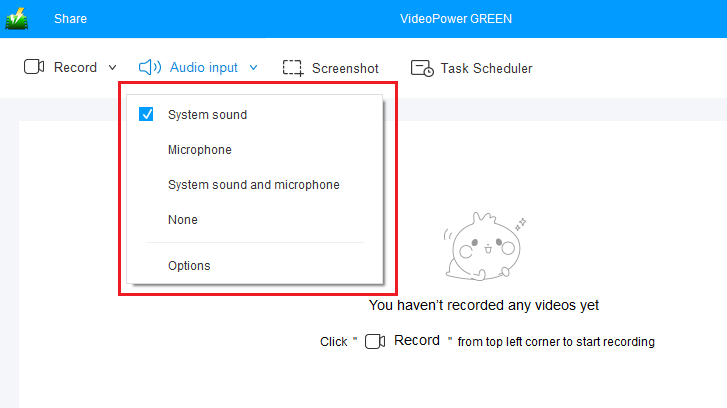
4.1 Select sound source
It is recommended to check the audio input before recording.
In this program, you can choose from four audio sources:
- System Sound
- Microphone
- System Sound and Microphone
- none.
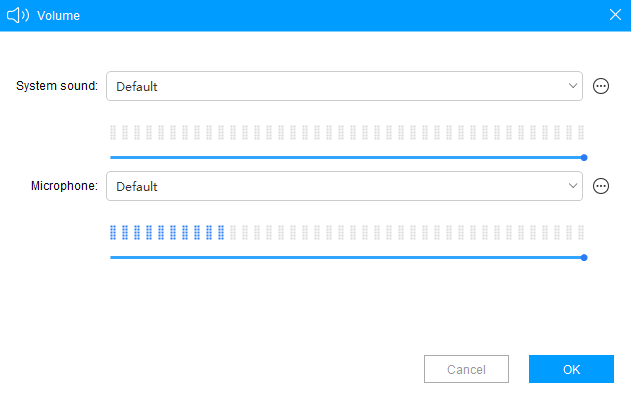
If the recorded video or audio has no sound,
navigate to “Options” and check the volume of the recording device,
or select the speaker or microphone device to record from the list.
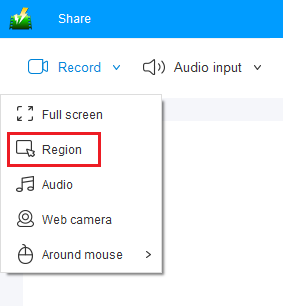
4.2 Select Recording Mode
VideoPower GREEN has five recording modes:
- Fullscreen:
The recording area will be the whole screen of the computer.Notice:
Depending on the performance of your computer, the recorded video may not be smooth.
Change to Region mode and try recording again. - Region:
The recording area will be the needed region of the computer screen.Notice:
Depending on the performance of your computer, the recorded video may not be smooth.
Change to Fullscreen mode and try recording again. - Audio only:
Select “Only Audio” to record the audio-only.
You can select the audio file format for your recorded audio.
You can save your files like MP3, AAC, OGG, WMA, WAV, FLAC, and other file formats. - Web camera:
Select this option to record video from an external webcam or a built-in laptop camera.Tip: Make sure your webcam is properly connected to your computer before launching VideoPower GREEN. Otherwise, the camera cannot be detected properly. - Around mouse cursor:
The mouse position is the center of the recording range. If you move the mouse during recording, the recording range will follow the movement of the mouse.
Select the recording area size from the available sizes, suitable for either a large or small playback area.
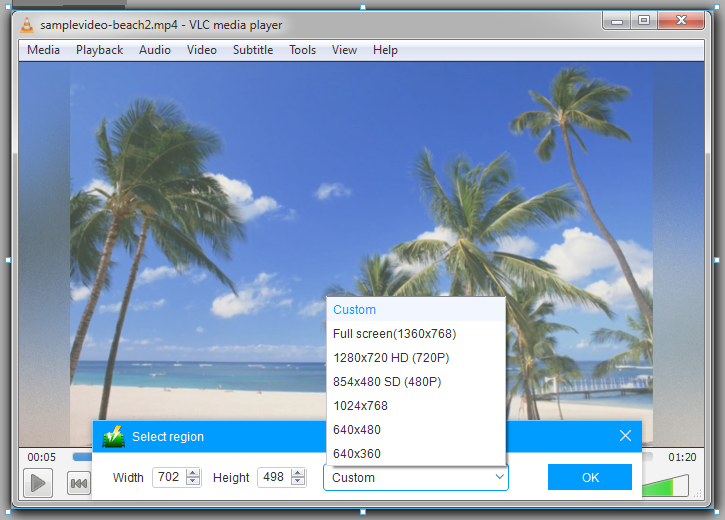
The following will guide you on how to use “Region”.
4.3 Starting recording
When “Area customization” mode is selected, click the mouse cursor and drag to select the area you want to record.
You can then adjust the recording range by entering it manually, selecting a program preset resolution, or dragging the border.
Click “OK” when you finished setting the recording range.
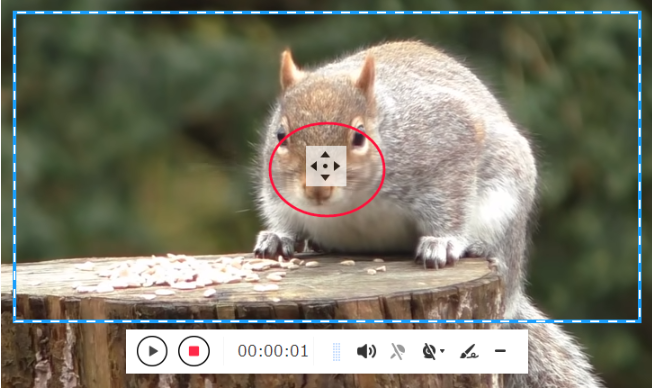
4.4 Moving the recording range during recording (optional)
This product can move the recording range window during the recording.
There are two ways:
Method 1
With this method, the recording range can be moved during recording without pausing the recording.
Set “Settings” – “Recording” to “Allow movement of recording range during recording”.
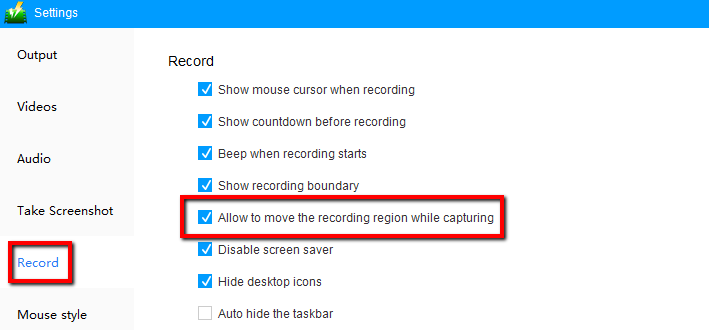
After completing this setting, you can move the area by moving the mouse cursor to the four corners of the capture area.
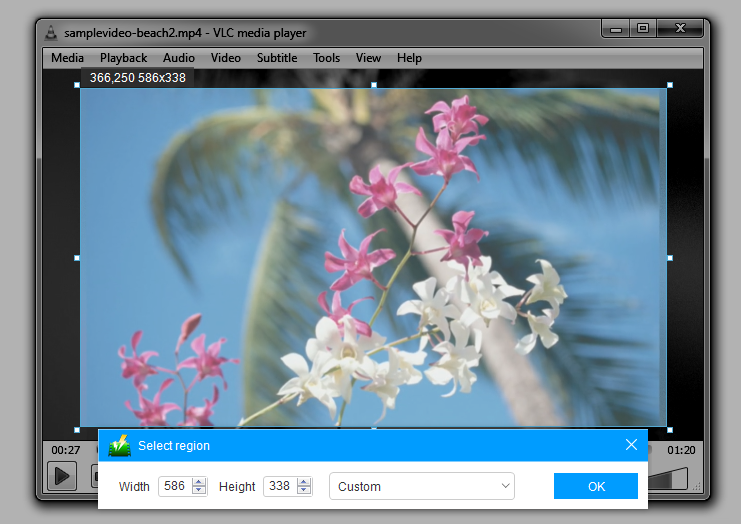
Method 2
After pausing the recording, an icon will appear at the center of the recording area and you can click and drag the recording range anywhere you want.
With this method, it is not necessary to set “Allow movement of recording range during recording”.
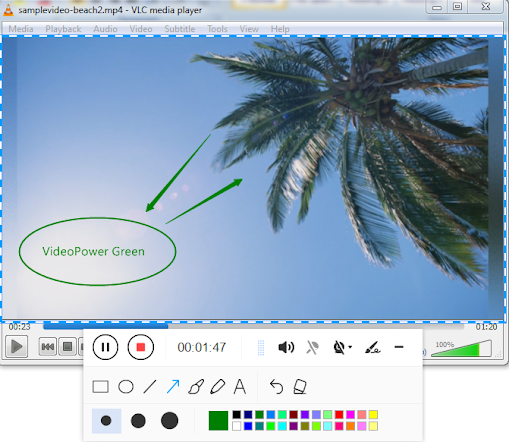
4.5 Annotating the screen during recording (optional)
VideoPower GREEN also allows you to annotate during recording. You can add lines, arrows, circles, rectangles, and text to your video. Just click the pen icon to access editing options. Also, you can pause the recording to annotate the screen and continue recording as it is.
If you want to make a PIP (picture-in-picture) recording, you can insert a webcam into the recording by clicking the webcam icon on the toolbar.
4.6 End recording
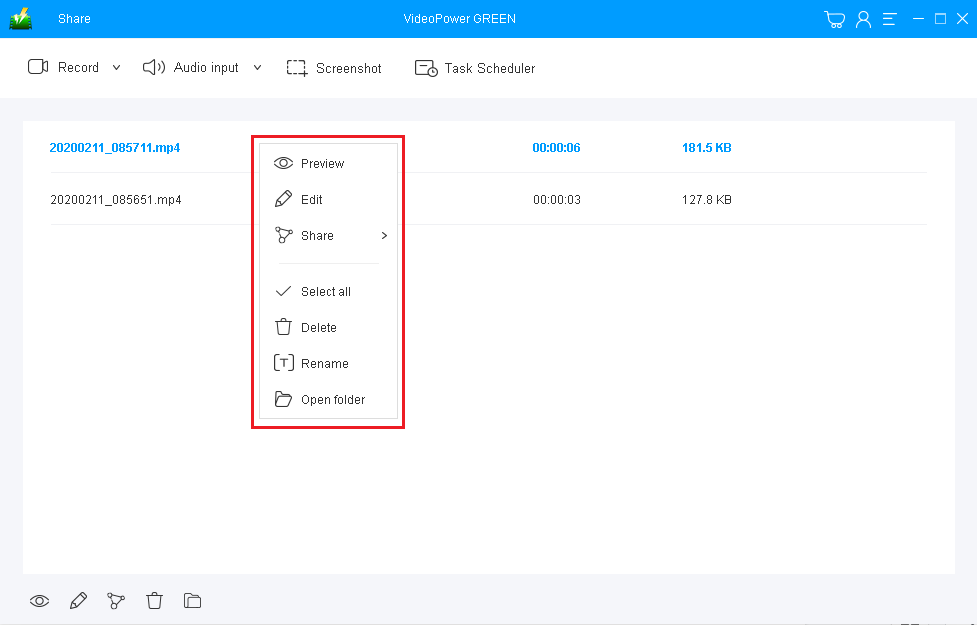
When recording is complete, press the red/stop button to end. Then, recorded videos will be displayed in the recording list and will be automatically saved on the local disk. Also, you can right-click the file name to play, edit, rename, open a folder, etc.