Index
BLUE
4. Convert video and audio
To convert video or audio files to another format, follow the steps below:
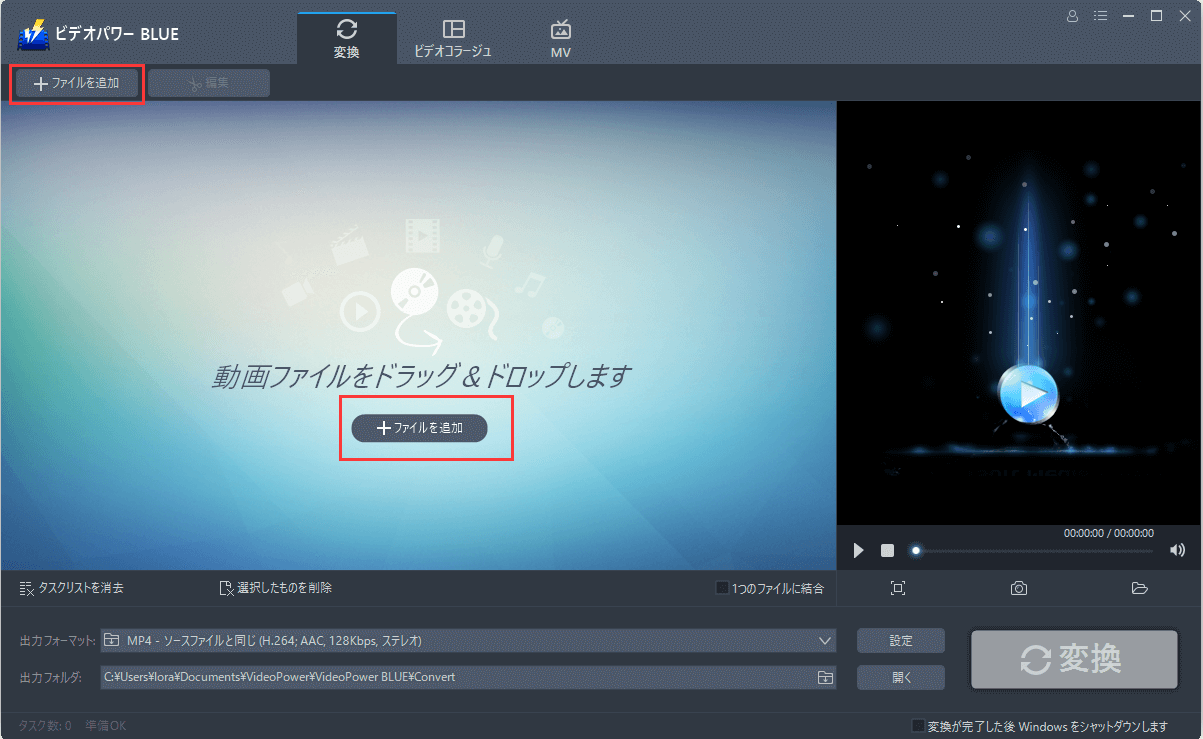
Step 1. Add video and audio files to convert.
In adding audio and video file, just click “Add File” or drag the file on the product screen to start converting it.
Delete or merge added files.
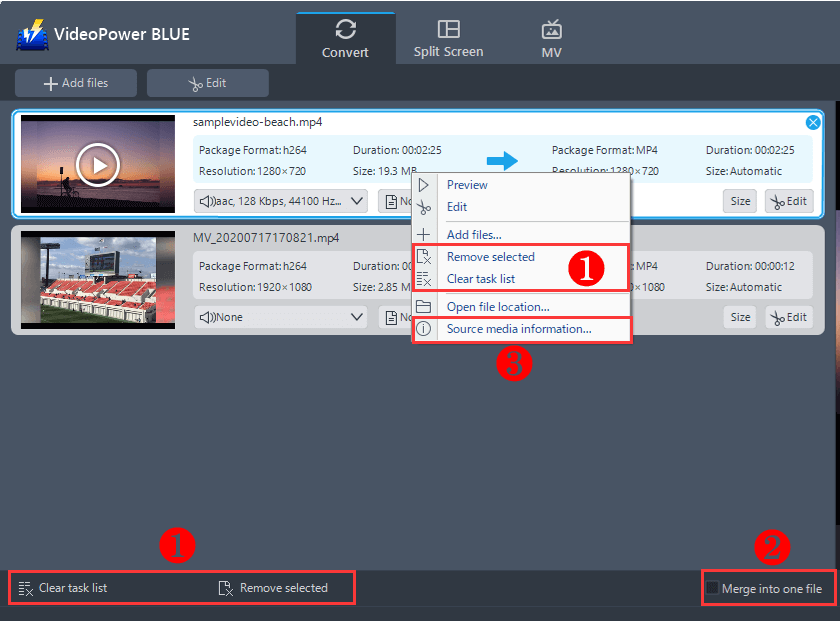
1) Delete file
If there is a file added by mistake and you want to delete it, select the file and click “Remove selected” from the button below the file list or right-click the file and select “Remove selected”. But, if you want to delete everything, click the “Clear task list” below.
2) Merge into one file
If you want to merge multiple video or audio files, add the files you want into the list, then select “Merge into one file” and save it.
3) Source Media Information
Right-click and select “Source media information” to check details such as video and audio codec, resolution, bit rate and frame rate.
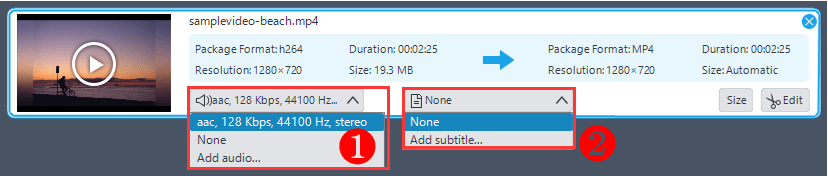
Add audio tracks and subtitles
1) Click the audio track toolbar below the audio and video file details and select your desired audio track. Adding tracks from HDD is also possible.
2) Click the subtitle toolbar below the audio and video file details and select “Add Subtitle” to add an external subtitle.
Tip:
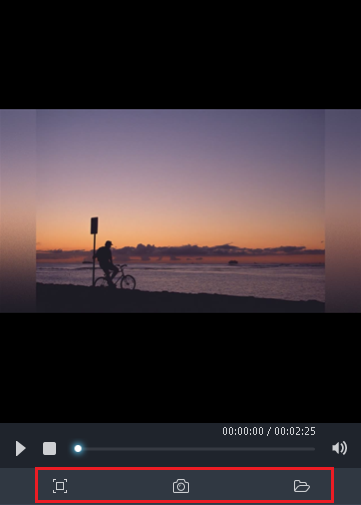
You can take a screenshot on the preview screen on the right side of the video list.
Play, pause and playback the video on the screen you like.
Step 2. Set output format.
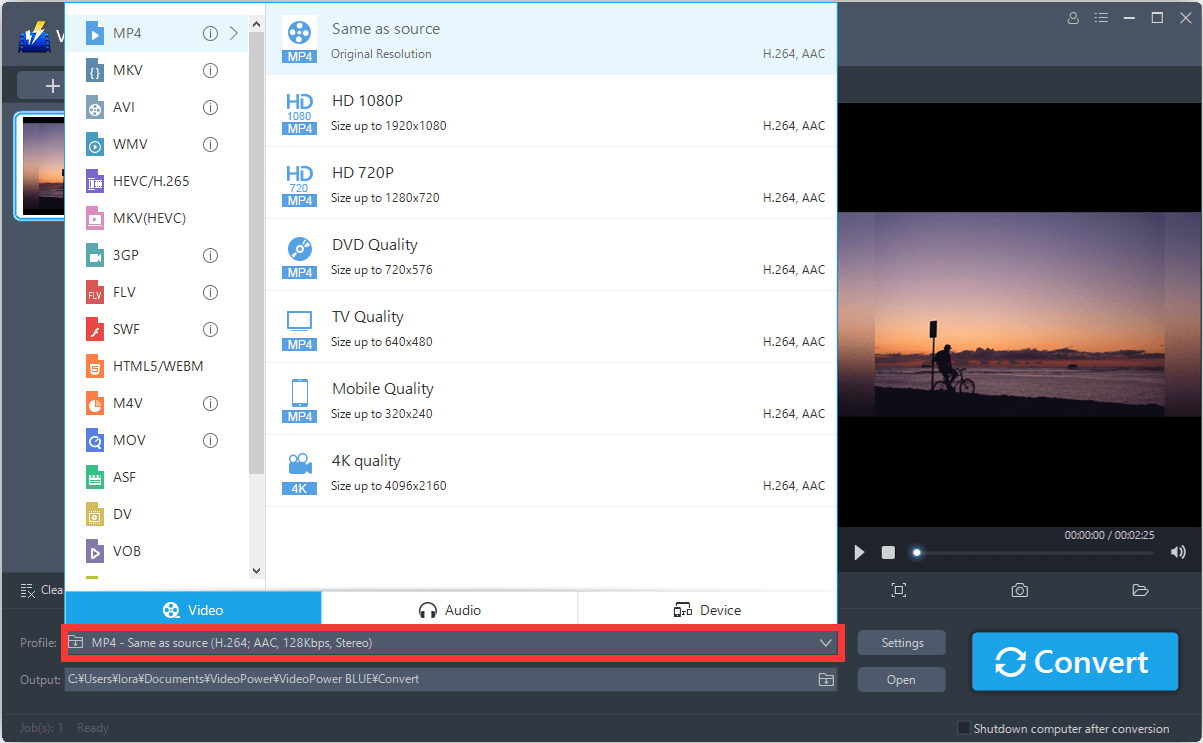
2.1 Select the output format.
Click the button at the right portion of the profile’s search bar to open its list.
There are three categories:
Video: There are formats such as MP4, MKV, AVI, WMV, HEVC / H.265, FLV, etc. Each format has profiles such as 4K / 1080P / 720P / DVD quality.
Audio: There are formats such as MP3, MP2, WMA, M4R, M4A, AC3, DTS, AAC, FLAC, etc. High, medium and low sound quality can be changed too.
Devices: There are profiles for smartphones such as Apple, Samsung, Sony, LG.
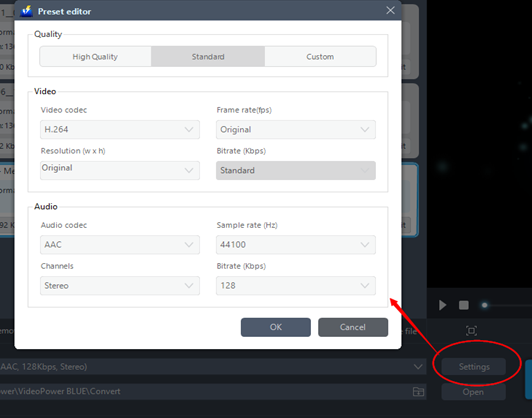
2.2 Set parameters.
After selecting a profile format, click the “Setting” button at the right side of the profile search bar and select the quality of the media file you desire or customize each parameter.
2.3 Set output folder
Click the button at the right portion of the output’s search bar and select the folder where the file will be saved.

Step 3. Start the conversion
After completing the desired file setting, click “Convert” to start converting the video or audio.

Note:
- If necessary, during the conversion, click the “Stop” button at any time to stop the conversion. Converting long videos can take a long time.
- To shut down the computer after the conversion most especially in users’ absence, click and activate “Shut down Windows after conversion is complete” and the computer will automatically shut down after the conversion.
- To check the converted file, click the “Open” button to open the destination for the converted video and audio.