Index
BLUE
5. Edit video and audio
To enhance the quality of the audio or video file, trim, crop, or cut out the desired part from the file using the editing feature tool. At the same time, adding watermarks and inserting subtitles accordingly will be possible.
Note: Skip this step if you do not need to edit the video.
5.1 Open the Edit Screen
Select a video or audio and click the “Edit” button to open the editing screen to start editing video and audio files.

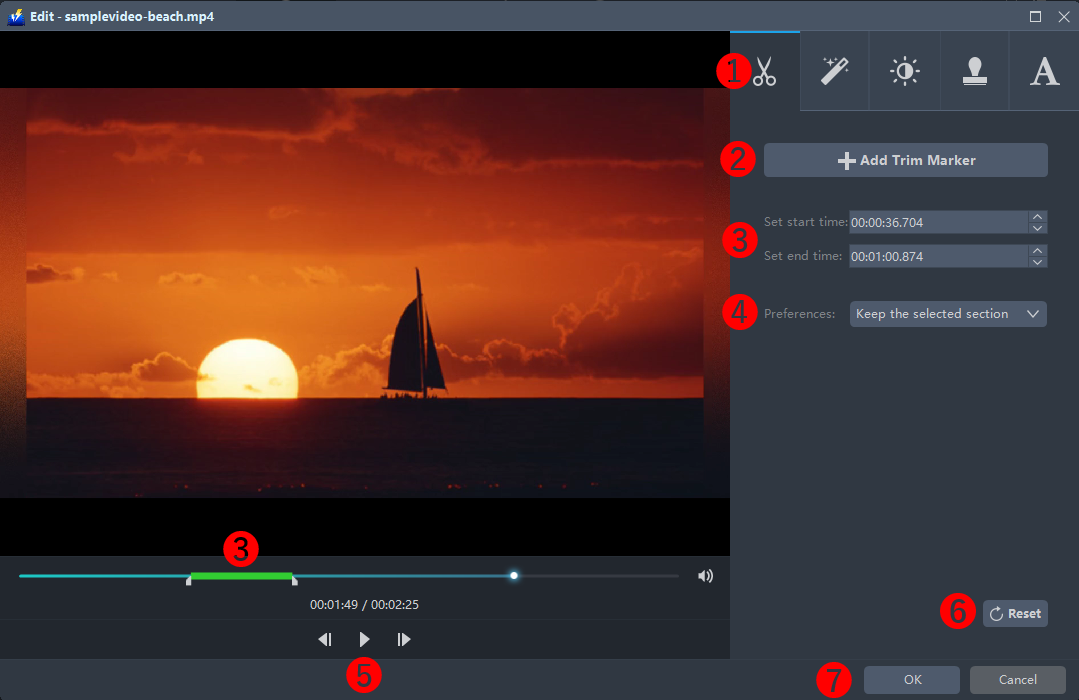
5.2 Trim the video.
Trimming the audio and video file can be done through:
1) Clicking the Trim button from the menu bars in the editing toolbar page;
2) Clicking the “Add Trim Marker” button to show slider or trackbar;
3) Adjusting the time in seconds in the preview playback screen by dragging the slider or the trackbar or by clicking the up and down button at the start and end time bar;
4) Setting the desired preferences like keeping or deleting the selected part;
5) Previewing changes using the “Play” button;
6) Canceling, changing or deleting changes using the “Reset” button; and
7) Clicking the “OK” button to save and “Cancel” button if otherwise.
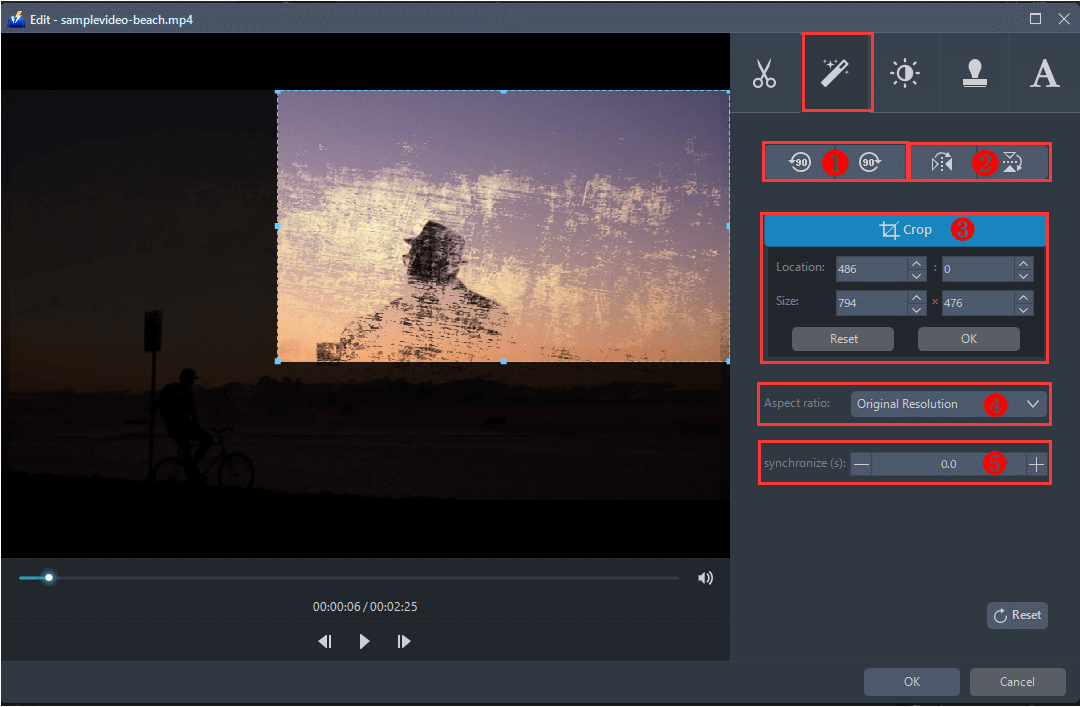
5.3 Adjust the video.
Adjusting video file effects can be done through:
1) Rotate: The file can be rotated 90 degrees clockwise and 90 degrees counterclockwise.
2) Flip: The file can be flipped from left to right and right to left and also can be flipped upside down.
3) Crop: Remove unwanted areas in the image to get the desired image.
4) Aspect Ratio: Sets the aspect ratio or the ratio of the width to the height of the video. Original / 16: 9/4: 3 / 2.35: 1.
5) Synchronization: Sets the audio timing for the video. Adjust the timing by setting it to the minus side if the video is delayed, and setting it to the plus side if the audio is advanced.
*Click the “Reset” button to return to its original format.
*Click the “OK” button to save and “Cancel” button if otherwise.
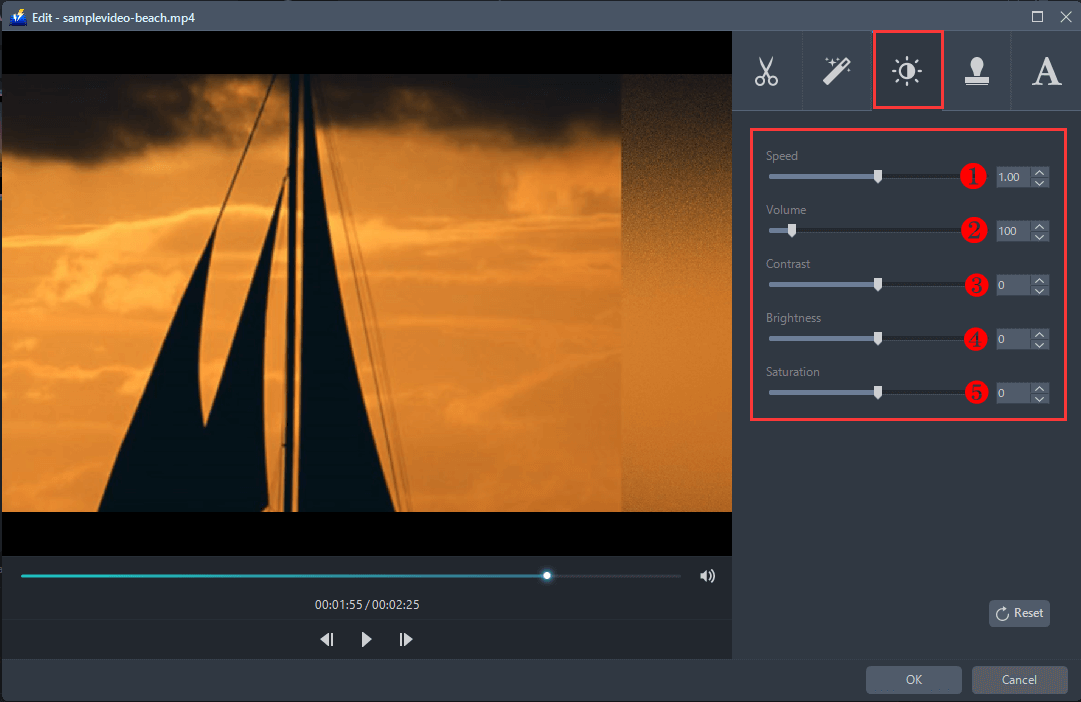
5.4 Adjusting the video effect.
1) Speed: Adjust the video playback speed from 0.5 to 2.0 as the larger number is faster and the original is 1.0.
2) Volume: Adjust the video’s audio volume from 0 to 200 as the highest audio volume and 100 as the original loudest volume.
3) Contrast: Sets the intensity of white and black. The larger the value, the clearer the video.
4) Luminance/Brightness: Sets the brightness. The higher the value, the brighter.
5) Saturation: Sets the vividness of the video image. The larger the value, the more vivid the video. It’s black and white (monotone) when the value is minimized and both values range starts from -100 to 100. The original range is 0.
*Click the “Reset” button to return to its original format.
*Click the “OK” button to save and “Cancel” button if otherwise.
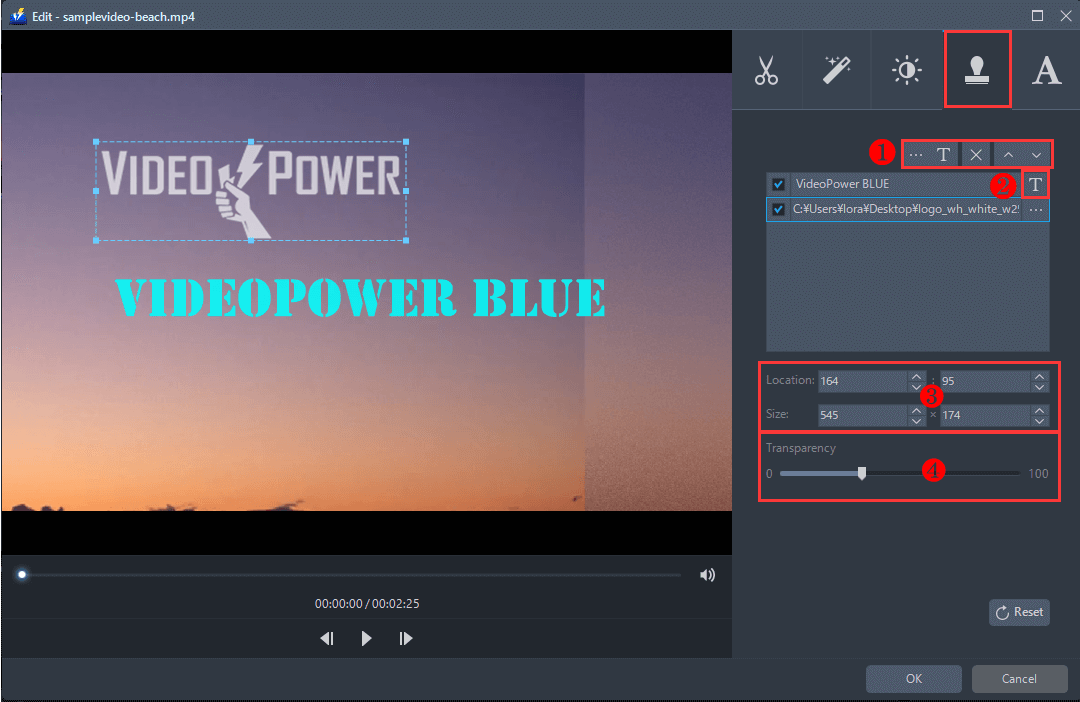
5.5 Add watermark to the video.
Another feature that adds creativity and uniqueness to the video file is to add a watermark. It is an identifying image or pattern that appears as various shades of lightness or darkness. Watermarks can be placed or added in multiple videos.
1) Click “…” to add an image file or “T” to add text watermark. To delete the selected watermark, click “X”. Choose watermark later and click “∧” and “∨” to change the watermark order.
2) Reviewing the list of added watermarks and if necessary, edit its font size and style, effect, color, and script by clicking the right button (T);
3) Repositioning and resizing the text by clicking the up and down button in the “Location” and “Size” bar or dragging the added watermark; and
4) Changing the transparency of the selected watermark by dragging the slider.
Click the “Reset” button to return to its original format.
Click the “OK” button to save and click the ” Cancel” button if otherwise.
Note: The larger the value of transparency, the more it becomes translucent.
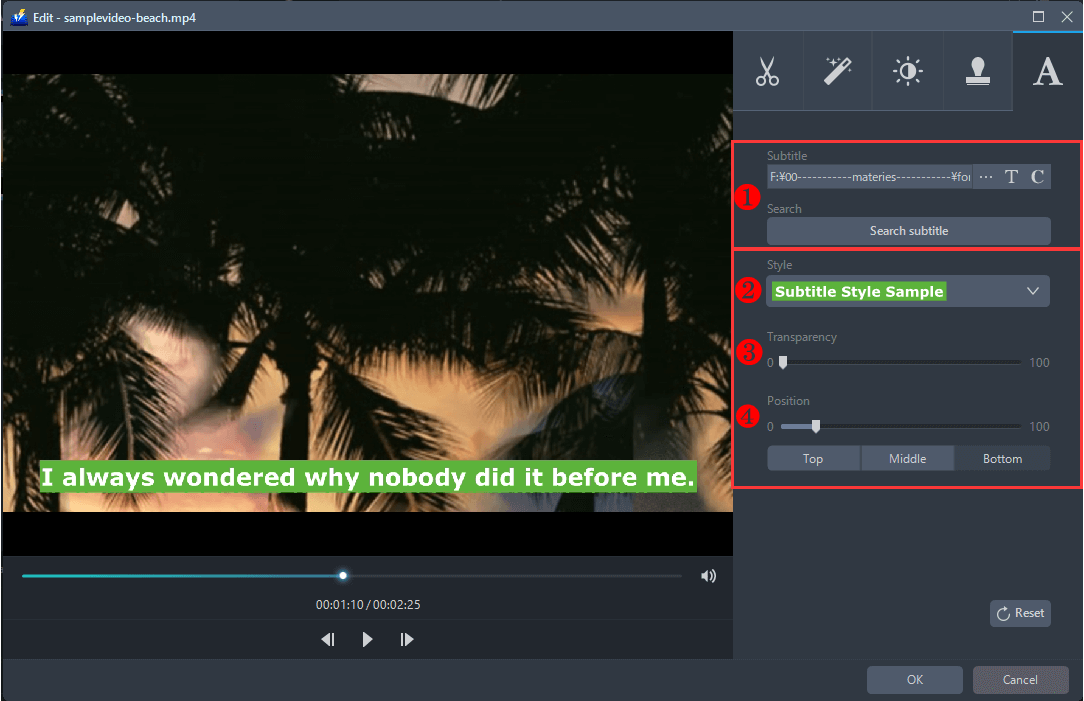
5.6 Add subtitle to the video
Adding subtitle to the video file can be done through:
1) adding subtitle from your computer or external file or searching a subtitle from the internet;
2) changing the desired subtitle style;
3) changing the transparency of the selected subtitle by dragging the slider;
4) changing the position of the selected subtitle by dragging the slider or by moving the subtitle to the top, middle or bottom in the preview screen.
Click the “Reset” button to return to its original format.
Click the “OK” button to save and click the ” Cancel” button if otherwise.