Index
RED
3. Setting
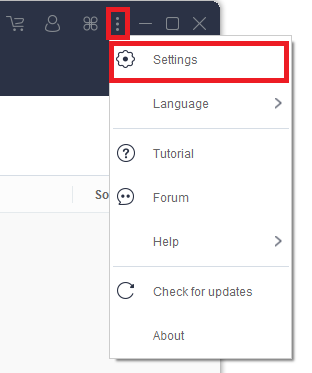
Adjusting the settings of the tool according to your preference, click the ellipsis menu icon(⋮) located at the upper right-hand side of the interface. From there you will see the “Settings”. Once clicked, a window will pop. Click each section, to change the format of the video and location of each saved video. Check out the picture below for better understanding.
Click the ellipsis menu icon(⋮) in the upper right corner of the screen, and click “Settings” from the pull-down menu to open the settings screen for this product. You can also click the “Language”, “Tutorial”, “Forum”, “Help”, Check for updates” and “About” for your other concerns.
3.1 General Settings
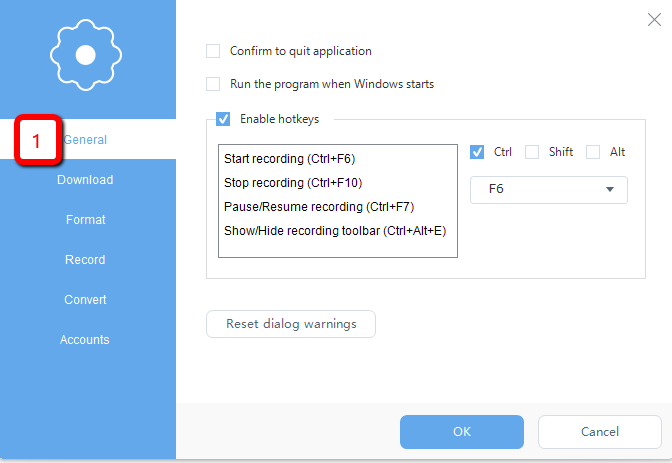
It is a menu bar that enables the user to configure the appearance or actions in this application. You can set either or not show a confirmation signal before quitting the application, to run the program when the windows start and set hotkeys for easier access.
Enabling hotkeys or keyboard shortcuts when using the recording feature helps you to easily start, stop, pause and resume recording even if you hide the recording toolbar especially when recording a video in full screen. Therefore, this product recommends you to set shortcuts or remember an existing shortcut
3.2 Download Settings
It is a menu bar that enables the user to set or change the default location of the video downloaded by the app itself. Change the location according to your preference. You can also set either or not to show the message when finding the media file, to automatically start the capture on program startup or to download when a new task added, enable the advanced detector, to ignore video size, exclude media file type and set how many videos can be downloaded simultaneously.

Output folder
You can set the destination to save the downloaded file.
Be sure to select this option before downloading video files from a browser installed on Windows using a detector that enables advanced detection (HTTPS support).
Ignore files smaller than (KB)
Videos of the size set in this setting item will not be downloaded. When downloading videos from some webs, many small-sized videos were automatically downloaded. These videos are advertising videos.
Therefore, set the size of the video you do not want to download according to the size of the advertising video.
Maximum number of simultaneous downloads
If the product is not registered, only one file can be downloaded. But after registering the product, you can set the maximum number of simultaneous downloads to 50.
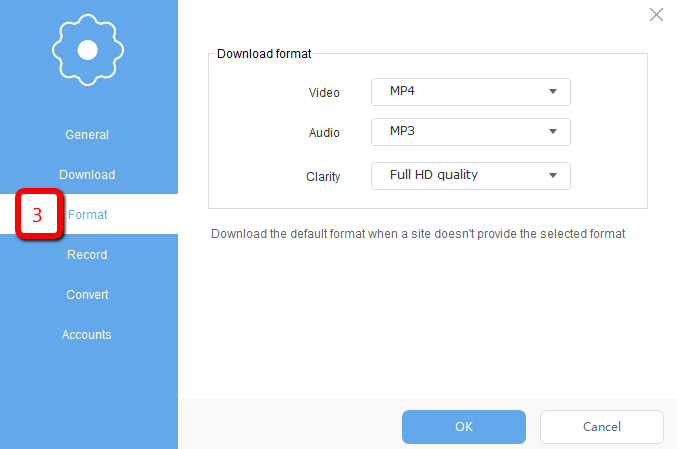
3.3 Format Settings
You can specify the video format, audio format, and resolution that have been preferentially downloaded.
There are formats such as MP4, AVI, and MOV for video. For audio, only MP3 and AAC can be selected.
Note:
If your site has a corresponding video source format, you can preferentially download it as it is. If the site does not have the specified format, it will download in the default format set on its destination. Or else, use the “Convert” function to save it in your preferred format.
3.4 Recording Settings
You can set the format and storage location of the recorded video.
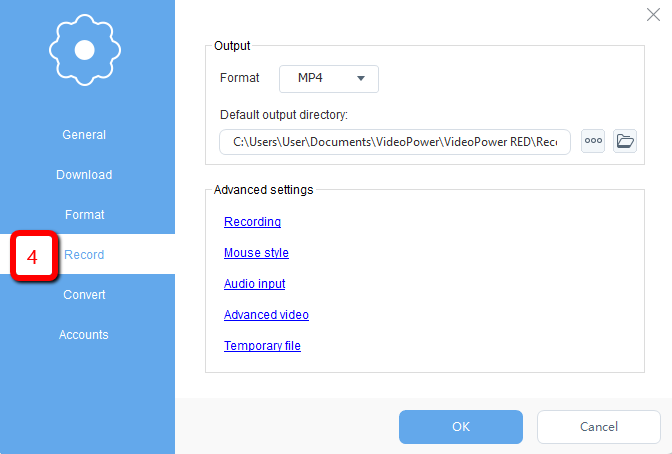
Output Settings
Set the desired format for your file and its default output directory.
Advanced settings
- Recording – You can set whether or not to minimize to the tray during recording, include the cursor in the capture, show countdown before recording, show recording boundary and show recording toolbar.
- Mouse Style – You can set whether or not to animate mouse buttons, mouse clicks’ color and to show mouse hot spot color and size.
- Audio input – This is where you can set sound sources for your recording files like system sound and microphone. Also, this is where you can set its audio quality.
- Advanced video -This is where you can set the movement of the recording region while capturing and to set either or not to improve the performance while editing. This is also where you optimize or not the video screen saver, desktop icons, taskbar and to enhance the window. Moreover, you can set the format, codec, bitrate, frame rate and mode of your file.
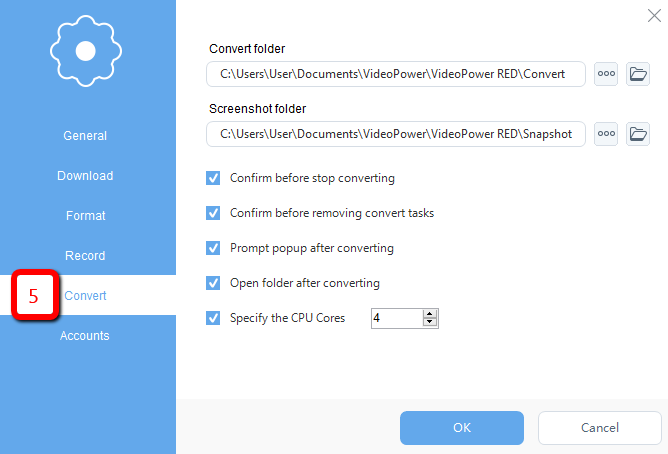
3.5 Conversion Settings
It is a menu bar that enables the user to set the output folder for the screenshot and converted file. Also, this is where you can set whether or not to show confirmation notice before stopping the conversion and removing converted tasks. It also prompts popups after converting, automatically opening the output folder after the conversion and also setting up specific CPU cores.
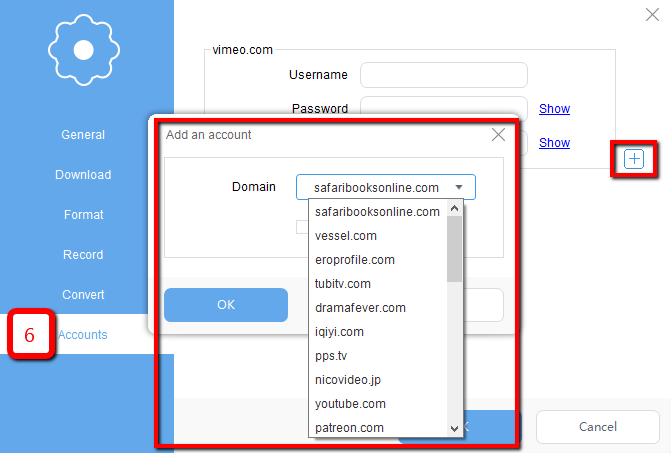
3.6 Accounts Settings
Account settings allow you to download paid or private videos from sites such as Lynda, Vimeo, Udemy, and
fc2. Click the add button(+) if you want to add a web account.
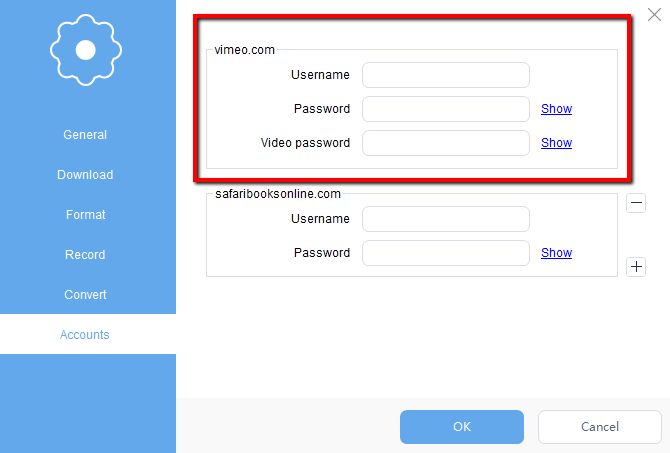
Tips:
- To download private videos from Vimeo, you need to enter a viewing password when adding an account.
- You must be a paid user of Lynda. Otherwise, Lynda videos cannot be saved offline.
3.7 Language Setting
This setting enables you to change the language from its default language to English for easier use. Just follow the steps below and learn.
Steps on how to set up the language settings:
Locate the Language Settings:
From the main iconic interface of this product, click on the ellipsis menu icon (⋮), look for the “Language” menu bar.
Select the Preferred Language:
Point the “Language” menu bar then a couple of languages will appear at its side. Click your preferred language and then the words and labels on the product will be automatically changed.
You can now use the product using the language you selected.
