Index
RED
9. Record Screen
Through the “Screen Record” feature, you can record both the video and audio then save it to your local files. It also supports many options for recording flexibility like recording audio-only or through a webcam. You can record from 1000+ online streaming sites such as YouTube, Hulu, DailyMotion, Amazon Videos, etc. Aside from video recording, it is also perfect to use in recording voice calls or video calls from Skype, Line, WeChat, etc.
Note: Prepare the video you want to record beforehand. To do this, simply go to the streaming site, search your preferred video, open and have it loaded completely. Then click Pause at the beginning of the video.
Step1: Set the recording settings
Refer to
3. Setting ⇒ 3.4 Recording Settings
and set the recording settings according to your preference.
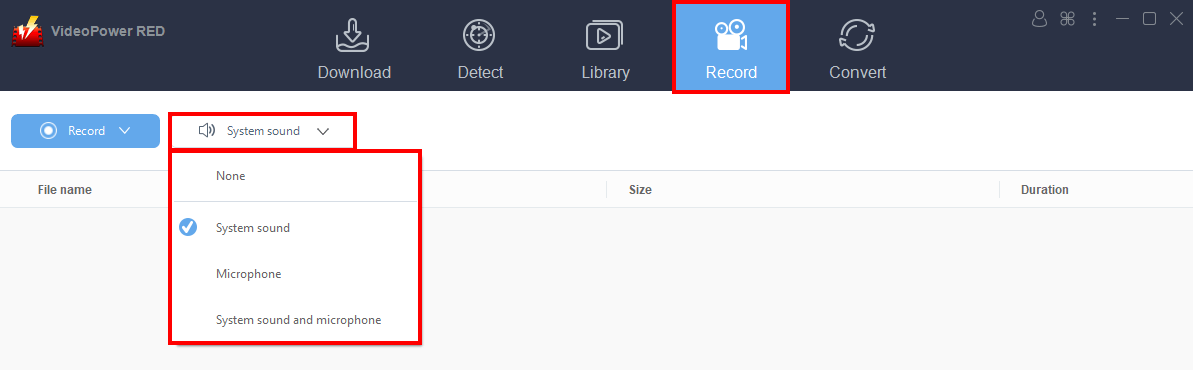
Step2: Set the audio input
There are four options to input audio: None, System Sound, Microphone, System Sound and Microphone.
System Sound:
If you need to record internal sounds like from an online video, downloaded video or more.
Microphone:
If you want to record external sounds like your voice for instructions, video call conversation, etc.
System sound and microphone:
If you need to record internal and external sound sources.
Step3: Set recording mode
There are five modes on the recording screen; Region, Full Screen, Around Mouse, Web Camera, and Only Audio.
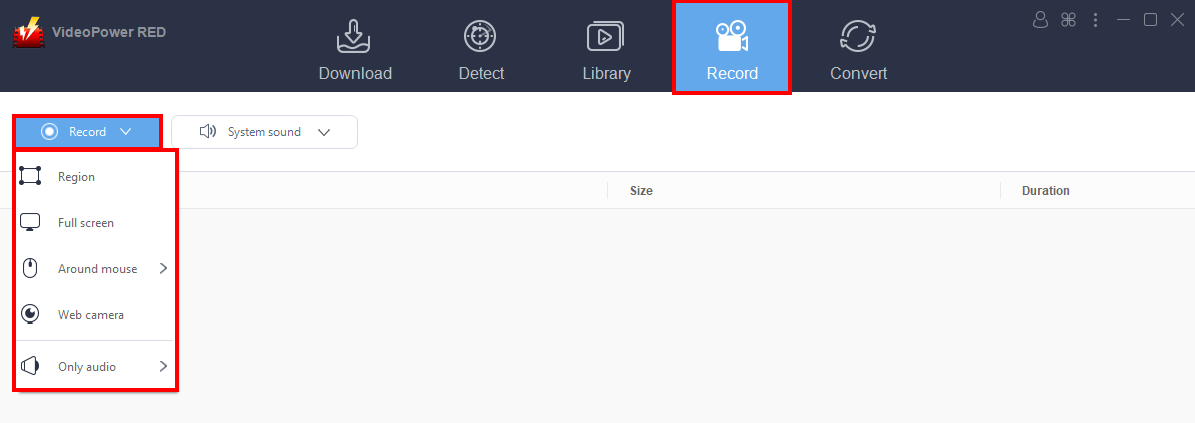
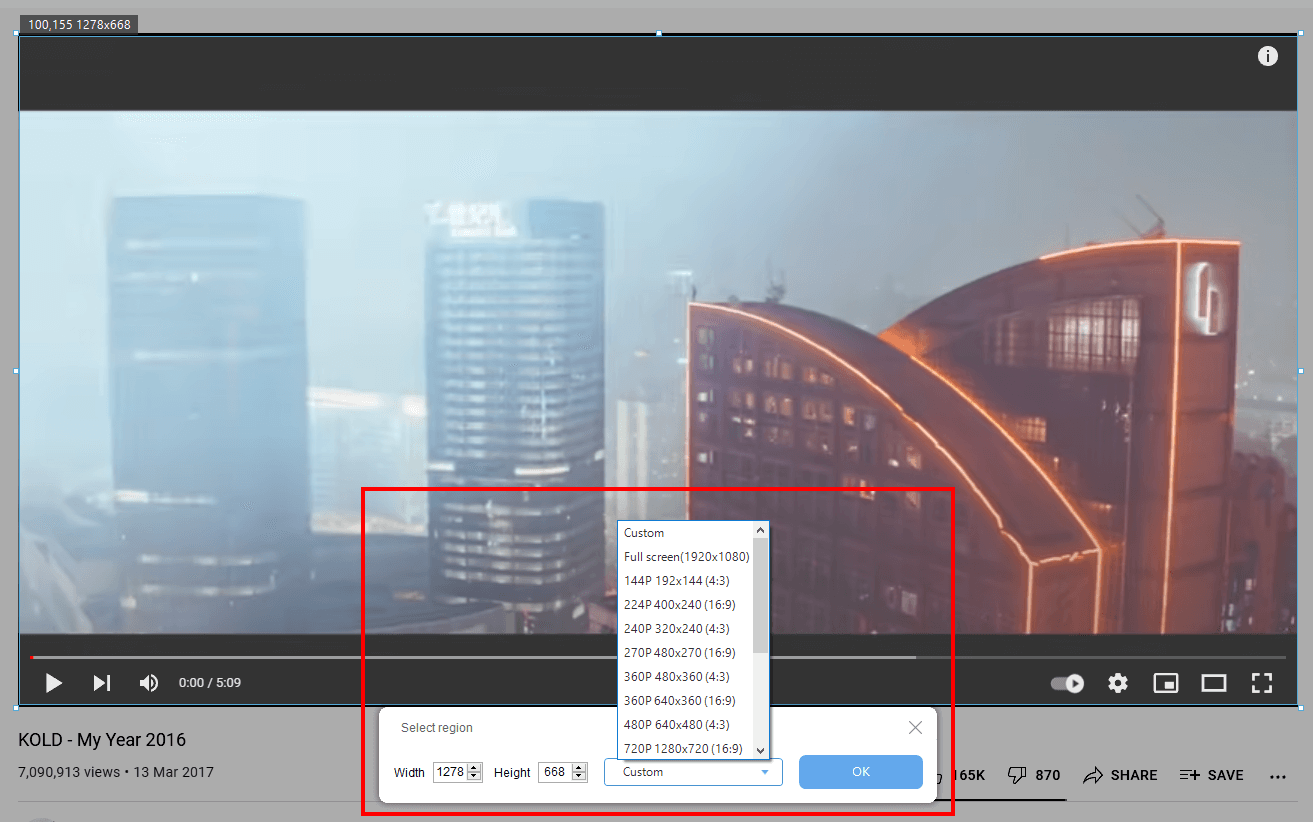
Region:
The recording area will be the needed region of the computer screen.
Full screen:
The recording area will be the whole screen of the computer.
Around mouse cursor:
The mouse position is the center of the recording range. If you move the mouse during recording, the recording range will follow the movement of the mouse.
Select the recording area size from the available sizes, suitable for either a large or small playback area.
Web camera:
Select this option to record video from an external webcam or a built-in laptop camera.
Audio only:
Select “Only Audio” to record the audio-only.
You can select the audio file format for your recorded audio.
You can save your files like MP3, AAC, OGG, WMA, WAV, FLAC, and other file formats.
Step4: Set Recording Range
Set the recording range you need by estimating your desired recording span and end it at the exact range you want.
Step5: Edit recording video
If necessary, edit the details of your video screen while recording.
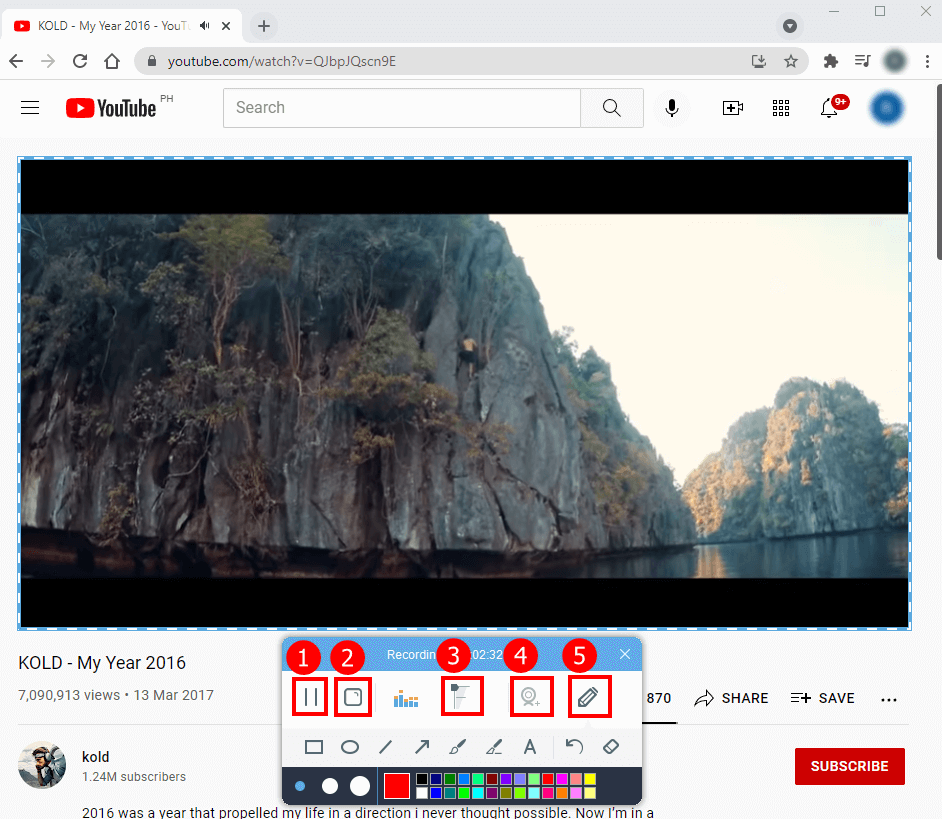
Editing toolbar tools or commands:
1) Pause:
Use to pause or resume recording.
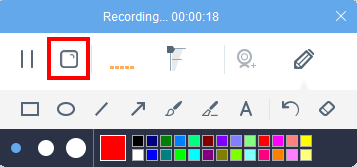
2) Stop:
Use to stop the recording. Stopping the recording will automatically save the recorded file and return to the screen recording application screen.
3) Volume:
Use to adjust the highness and lowness of the volume in the video you’re recording.
4) Webcam:
Use to add or insert the external video into the recording area screen.
5) Edit:
Clicking the pencil-like button (Edit) gives you the following editing tools: lines, shapes, text, colors, etc.
Step6: Stop Recording
Step7: Manage Recorded Videos and Audios
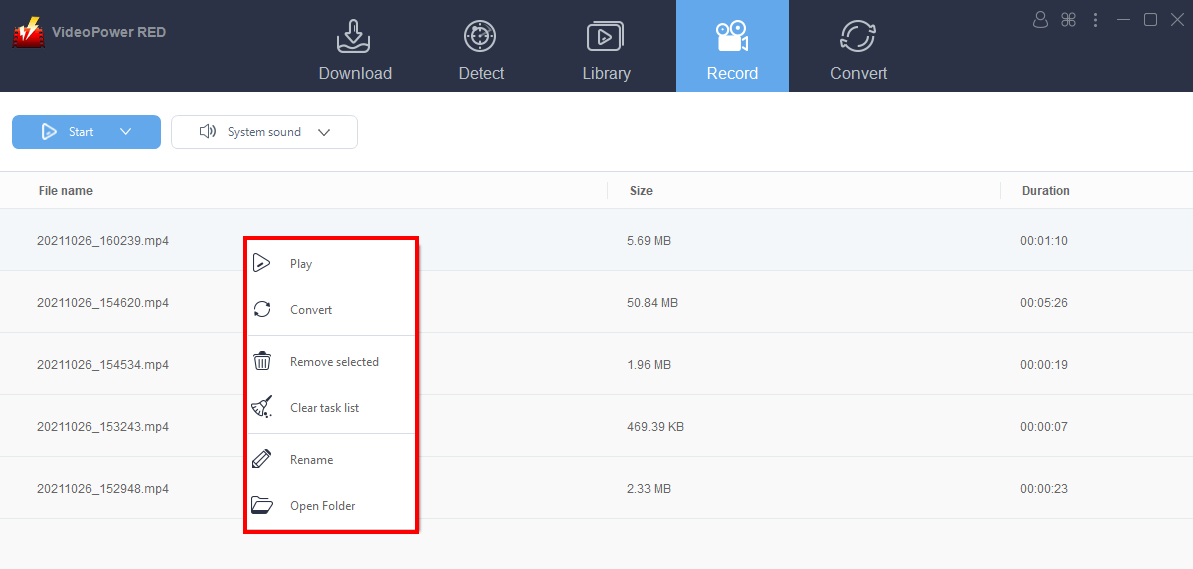
The recording will be displayed in the file list.
Right-click the recorded file to proceed to the next plan like to convert, remove, clear task list, rename, open file location or play. Also, you can double click the recorded file to play.
Play:
Plays back a video file through a built-in media player.
Convert:
Add the selected file to the “Convert” tab for editing, such as trimming, cropping, adding watermarks, etc.
Remove selected:
Deletes the selected file from the list. You can also “Delete from disk”.
Clear task list:
Delete all files from the list. You can also “Delete from disk”.
Rename:
Change the file name.
Open folder:
Opens the location where recorded files are saved.
Note: The recorded file will be automatically saved as soon as you end or stop the recording.
Right-click the file, you will have several options at your disposal.